
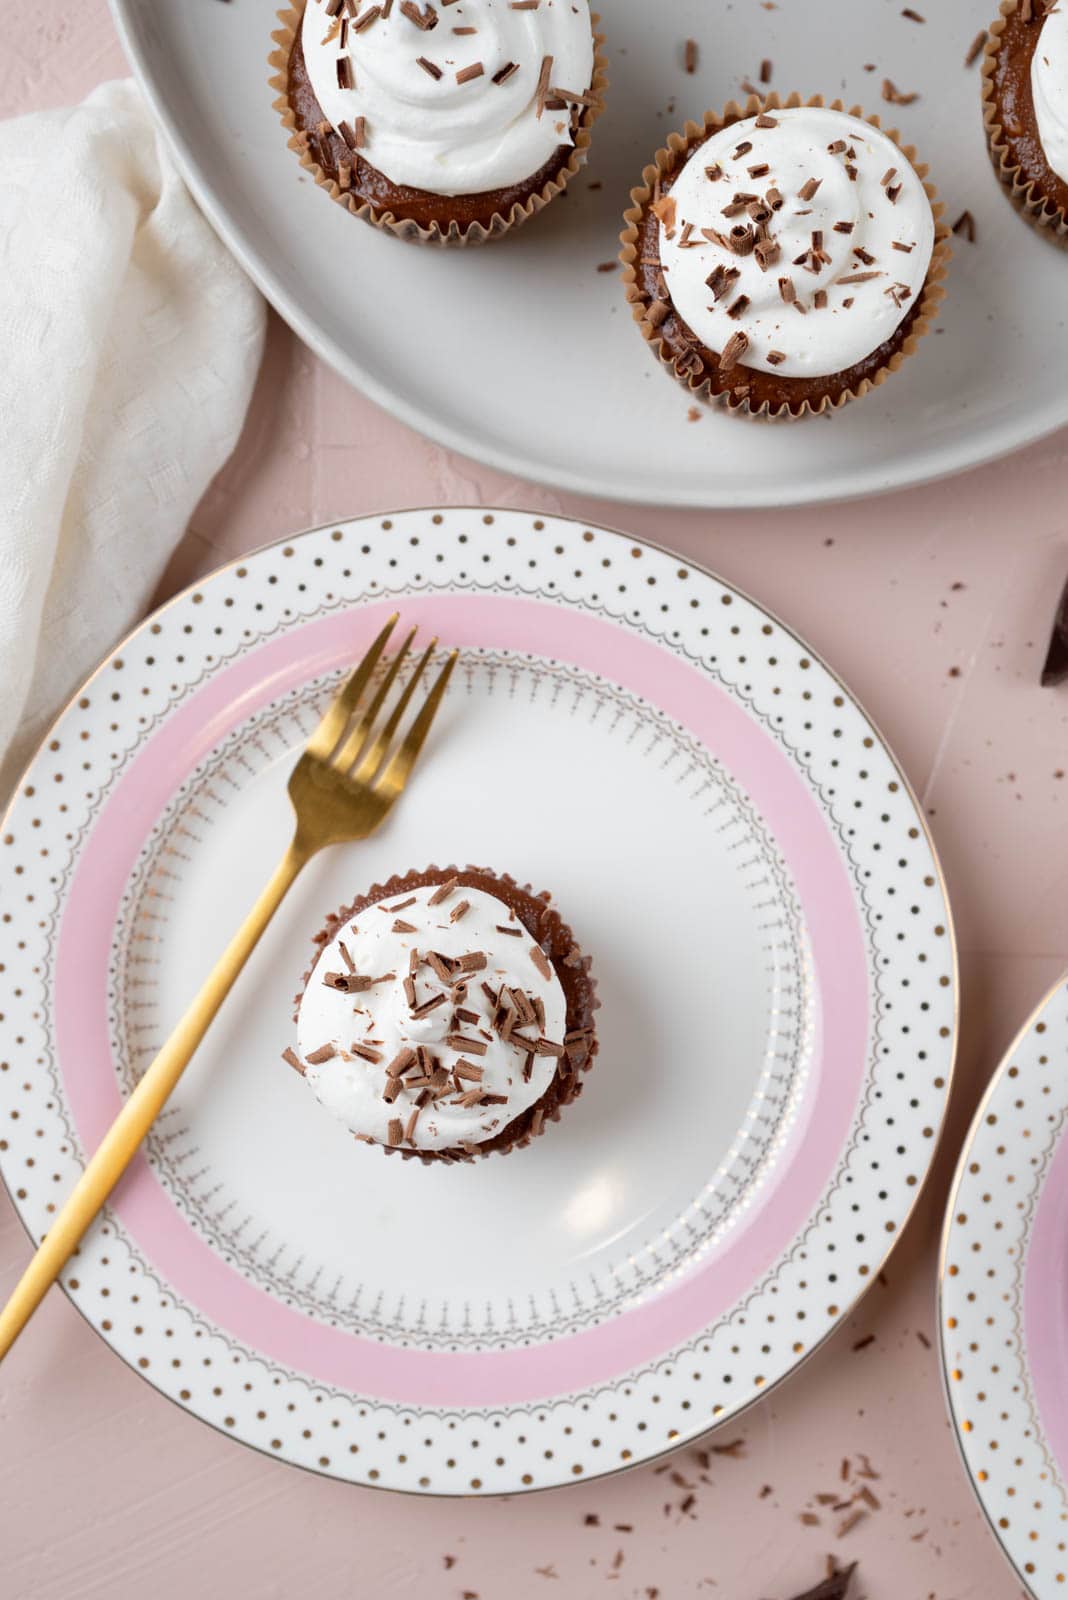
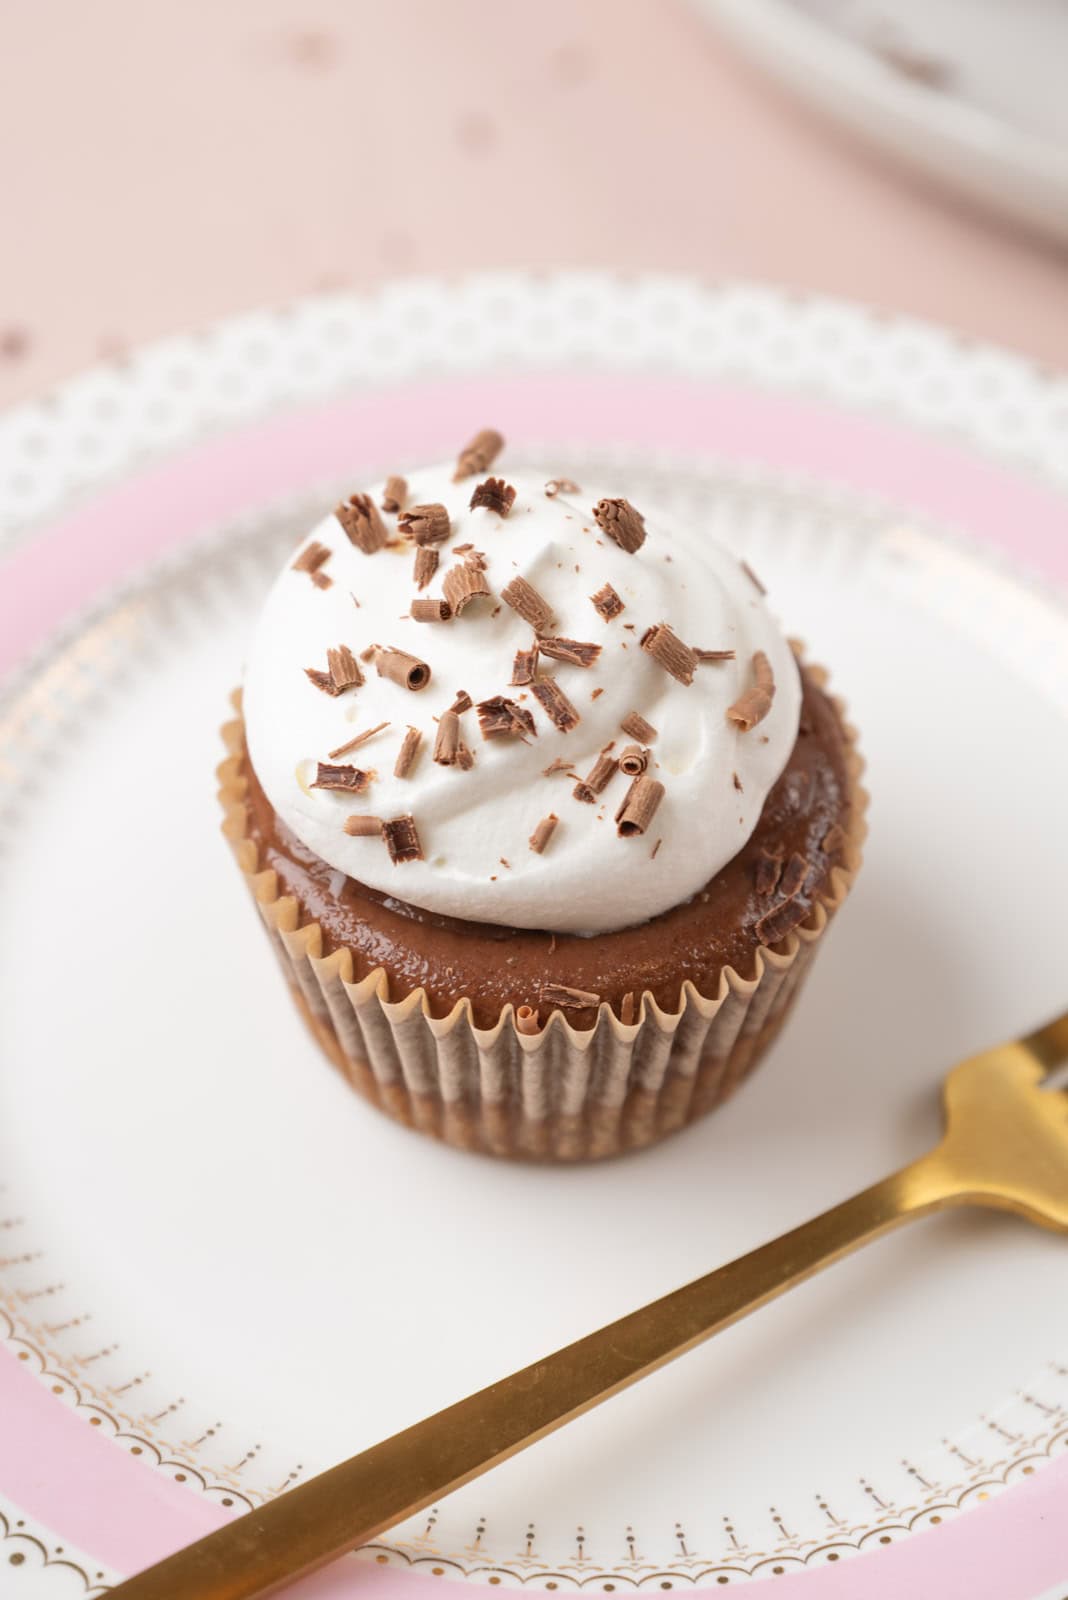
Silky mini chocolate cheesecakes infused with cinnamon, cloves, and a hint of spice. These Mexican hot chocolate-inspired treats are rich, perfectly portioned, and simple to make with no water bath required.

If you love a classic chocolate cheesecake but want something with more warmth and personality, this recipe is for you. Mexican hot chocolate is hot cocoa's moodier, more dramatic cousin. Darker, creamier, and layered with warm cinnamon and just the faintest hint of spice that lingers at the back of the palate. It's dark chocolate with depth and personality. Sipping a rich and creamy Mexican hot chocolate is a decadent treat. But I recently tasted Mexican hot chocolate as a frozen custard flavor and immediately thought, this would make an incredible cheesecake.
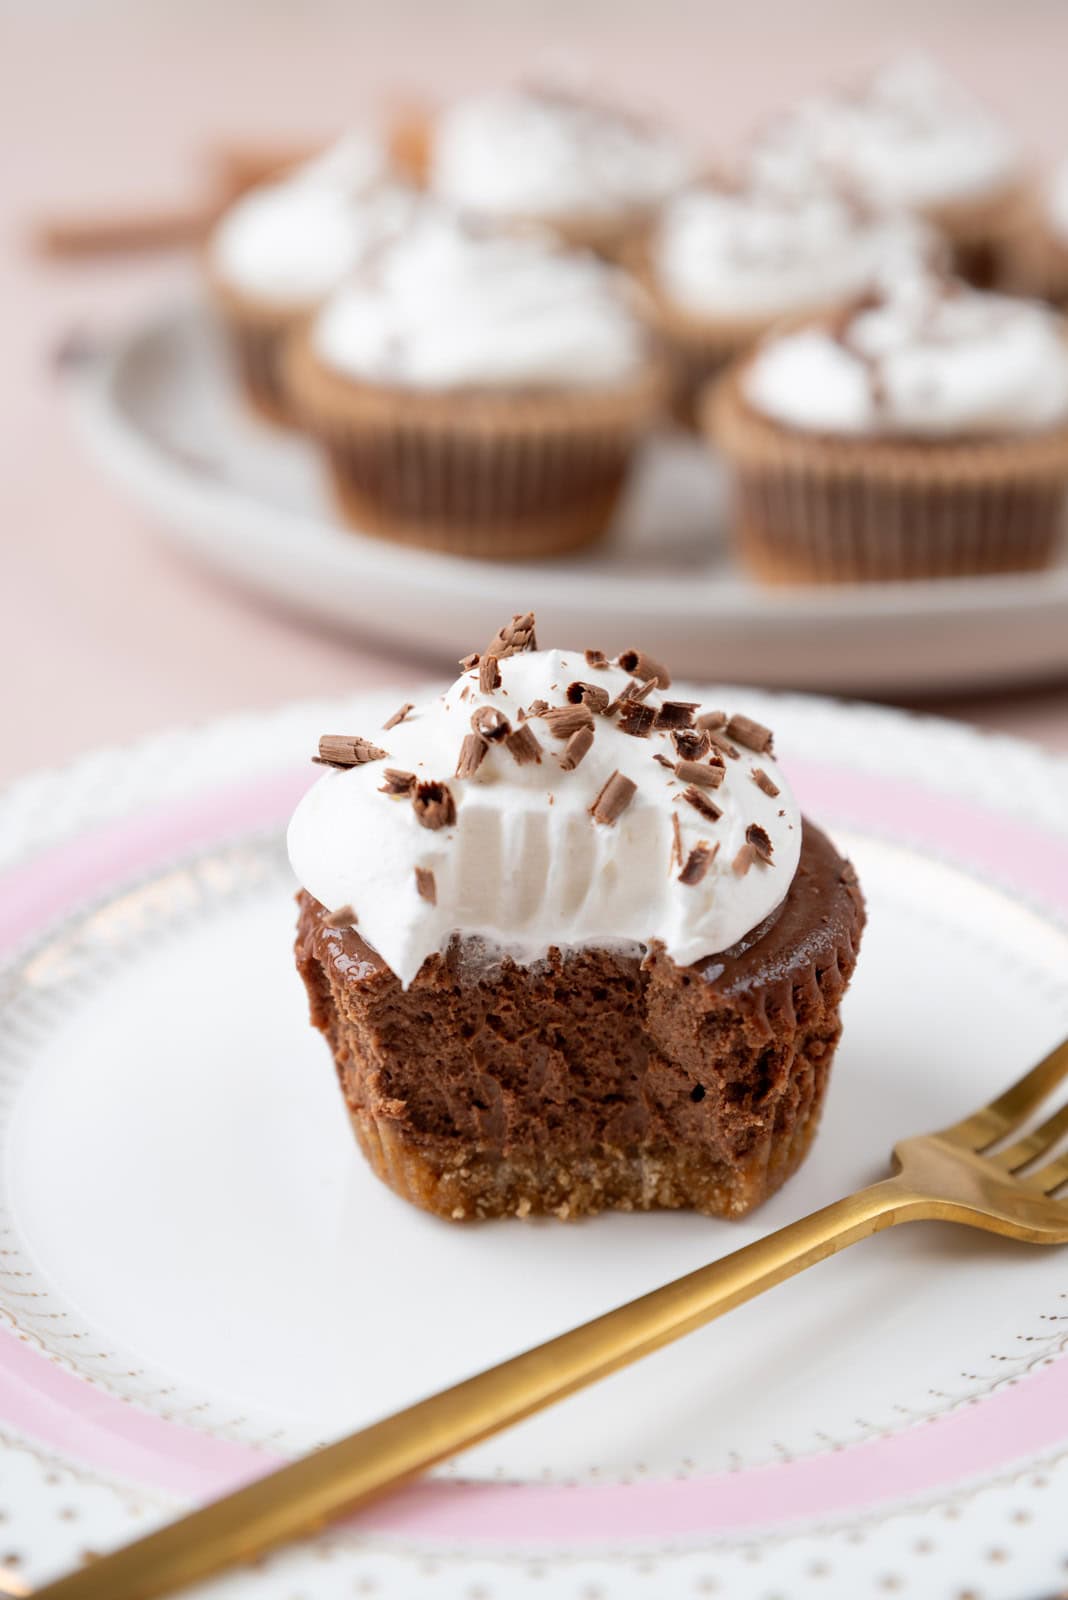
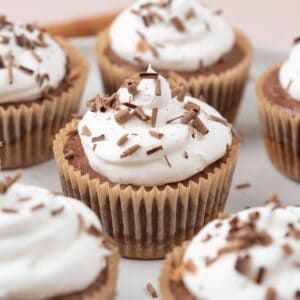
I love cheesecake, a little too much for my jeans if I'm being honest. I don't have a lot of self-control around it. When I make a traditional cheesecake, it takes four blocks of cream cheese, an hour in the oven, and then sits in the fridge daring me not to shove a fork in it every time I walk past. And who am I to argue with a cheesecake? So I made a smarter plan for myself. Mini cheeseackes! I still get decadent cheesecake, I just get it in a perfect portion, and this recipe makes a dozen servings. These Mexican hot chocolate-inspired mini cheesecakes are rich, gorgeously silky little cheesecakes that have a sophisticated chocolate flavor, and they use half the cream cheese of a traditional cheesecake, bake in just 17 minutes with no water bath and no messy cheesecake slicing!
Looking for more decadent chocolate dessert recipes? Try these: German Chocolate Cheesecake, Chocolate Espresso Bars, Chocolate Cinnamon Bundt Cake, Biscoff Blondies with Chocolate Chips.
What Is Mexican Hot Chocolate?
Mexican hot chocolate is traditionally made with dark chocolate, cinnamon, and a touch of chili and clove. Unlike typical hot cocoa, it's less sweet and more complex, thicker and creamier, with warm spice notes that deepen the chocolate flavor.
These mini cheesecakes are inspired by those classic flavors: rich dark chocolate, noticeable but balanced cinnamon, and just a subtle hint of warmth from cayenne all layered over a buttery cinnamon graham cracker crust.
Read more about Mexican hot chocolate here in a great article by Chef Andréa Lawson Grey.
Why You'll Love This Mini Chocolate Cheesecake Recipe
- Creamy, silky texture: Not dense or heavy
- Warm cinnamon flavor: Cinnamon that doesn't overpower. The spice is intentional and balanced! Chocolate comes first, then cinnamon warmth, then the faintest hint of heat.
- Perfectly Portioned: Each mini cheesecake is a perfect individual serving with no slicing required.
- No Water Bath Needed: Unlike traditional cheesecakes, these bake beautifully without the fuss of a water bath setup.
- Impressive but Achievable: They look elegant enough for special occasions but are straightforward enough for confident beginners.
- Make-Ahead Friendly: Making these a day or two ahead is ideal, but they can be made and served in as little as 5 hours, unlike a traditional cheesecake that needs a full 12 hours in the fridge to set up.
Jump to:
- What Is Mexican Hot Chocolate?
- Why You'll Love This Mini Chocolate Cheesecake Recipe
- Ingredient Highlights
- Step-by-Step Instructions Mini Mexican Hot Chocolate Cheesecakes
- Top Tips for Perfect Mini Cheesecakes
- Storage Instructions for Mini Cheesecakes
- Substitutions & Variations
- Equipment Needed for Mini Cheesecakes
- Serving Suggestions for Mini Mexican Hot Chocolate Cheesecakes
- Mini Chocolate Cheesecakes FAQs -
- Recent Recipes:
- Recipe
- Reviews
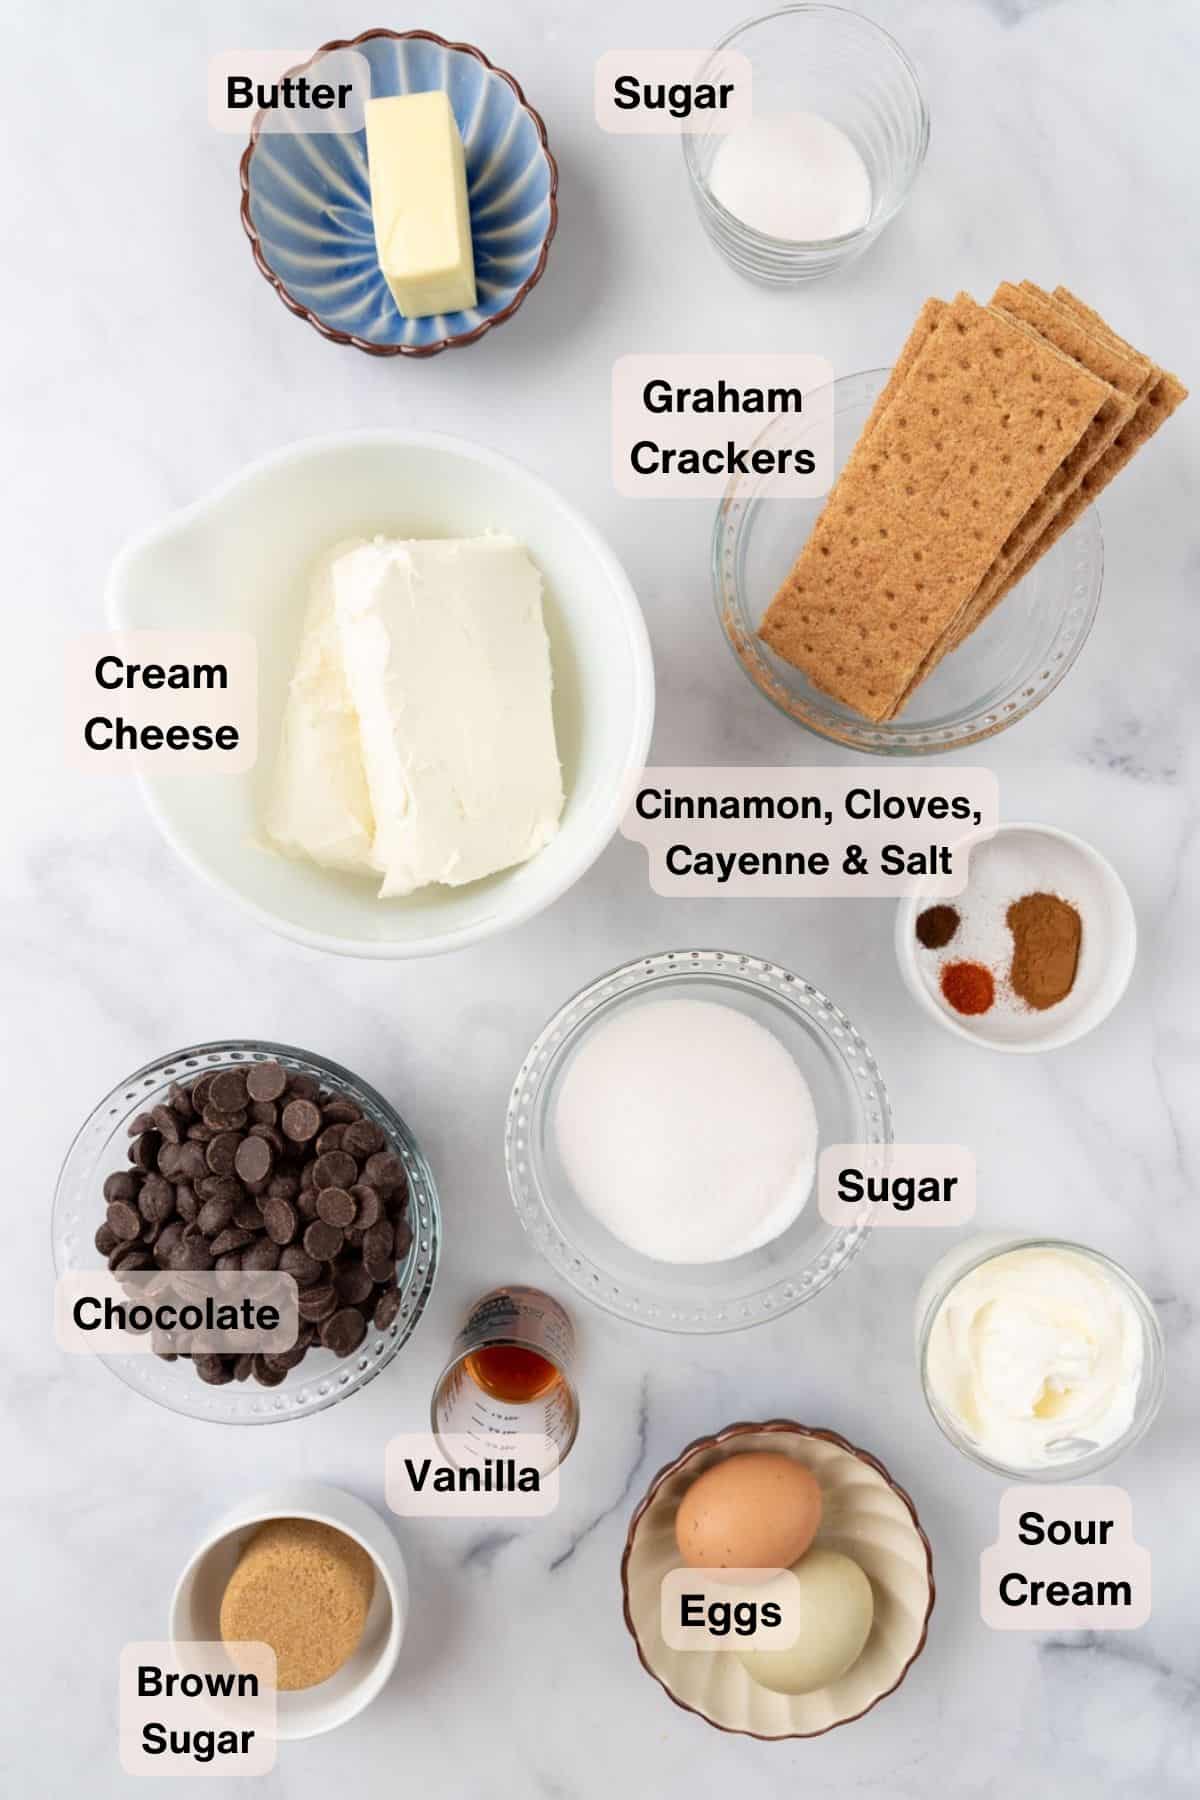
Ingredient Highlights
- Dark Chocolate (70-85%): The flavor foundation of these cheesecakes. Choose quality chocolate since it's a primary flavor. The higher cacao percentage balances the sweetness and provides the deep, sophisticated chocolate taste associated with authentic Mexican hot chocolate. Using melted dark chocolate instead of cocoa powder keeps the filling smooth and creamy and delivers deep chocolate flavor without drying out the texture. Chop chocolate bars or use chocolate chips.
- Cinnamon Graham Crackers: The crust echoes the spice in the filling and adds a toasty sweetness that ties everything together. I also love chocolate graham crackers in this crust, but they can be harder to find in some grocery stores. A crushed Oreo crust or honey graham cracker crust is also a delicious option.
- Blend of White and Light Brown Sugar: The brown sugar adds subtle molasses notes reminiscent of piloncillo, a Mexican brown sugar and traditional ingredient in Mexican hot chocolate, while white sugar keeps the cheesecake structured and smooth.
- Cinnamon + Tiny Pinch of Clove: Cinnamon is the primary spice here. Clove is optional. Just a pinch adds depth without turning it into a holiday spice cake. Use fresh ground cinnamon if possible, but it isn't necessary. Mexican canela (cinnamon), a Ceylon variety of cinnamon, is traditional to Mexican hot chocolate.
- Cloves: A little goes a long way. Ground cloves add an earthy depth that makes people wonder, "What is that amazing flavor?" without being identifiable.
- Cayenne or Ancho Chili Powder (Optional but Recommended): This doesn't make the cheesecake spicy. It creates warmth at the finish, the signature characteristic of Mexican hot chocolate. The secret ingredient that makes these memorable. Start with the recommended amount. It shouldn't burn but should create a gentle warmth that builds. You can always add more to the whipped cream topping if desired.
- Cream Cheese: Must be full-fat and at room temperature. If the cream cheese isn't room temperature, you get lumpy cheesecakes.
- Vanilla Extract: Pure vanilla extract is essential. It bridges all the flavors together and enhances the chocolate.
- Sour Cream: Creates the signature creamy, dense-yet-smooth texture. It also adds a subtle tang that prevents the cheesecakes from being one-dimensionally sweet. This, like the cream cheese, needs to be room temperature.
See the recipe card below for quantities.
Step-by-Step Instructions Mini Mexican Hot Chocolate Cheesecakes
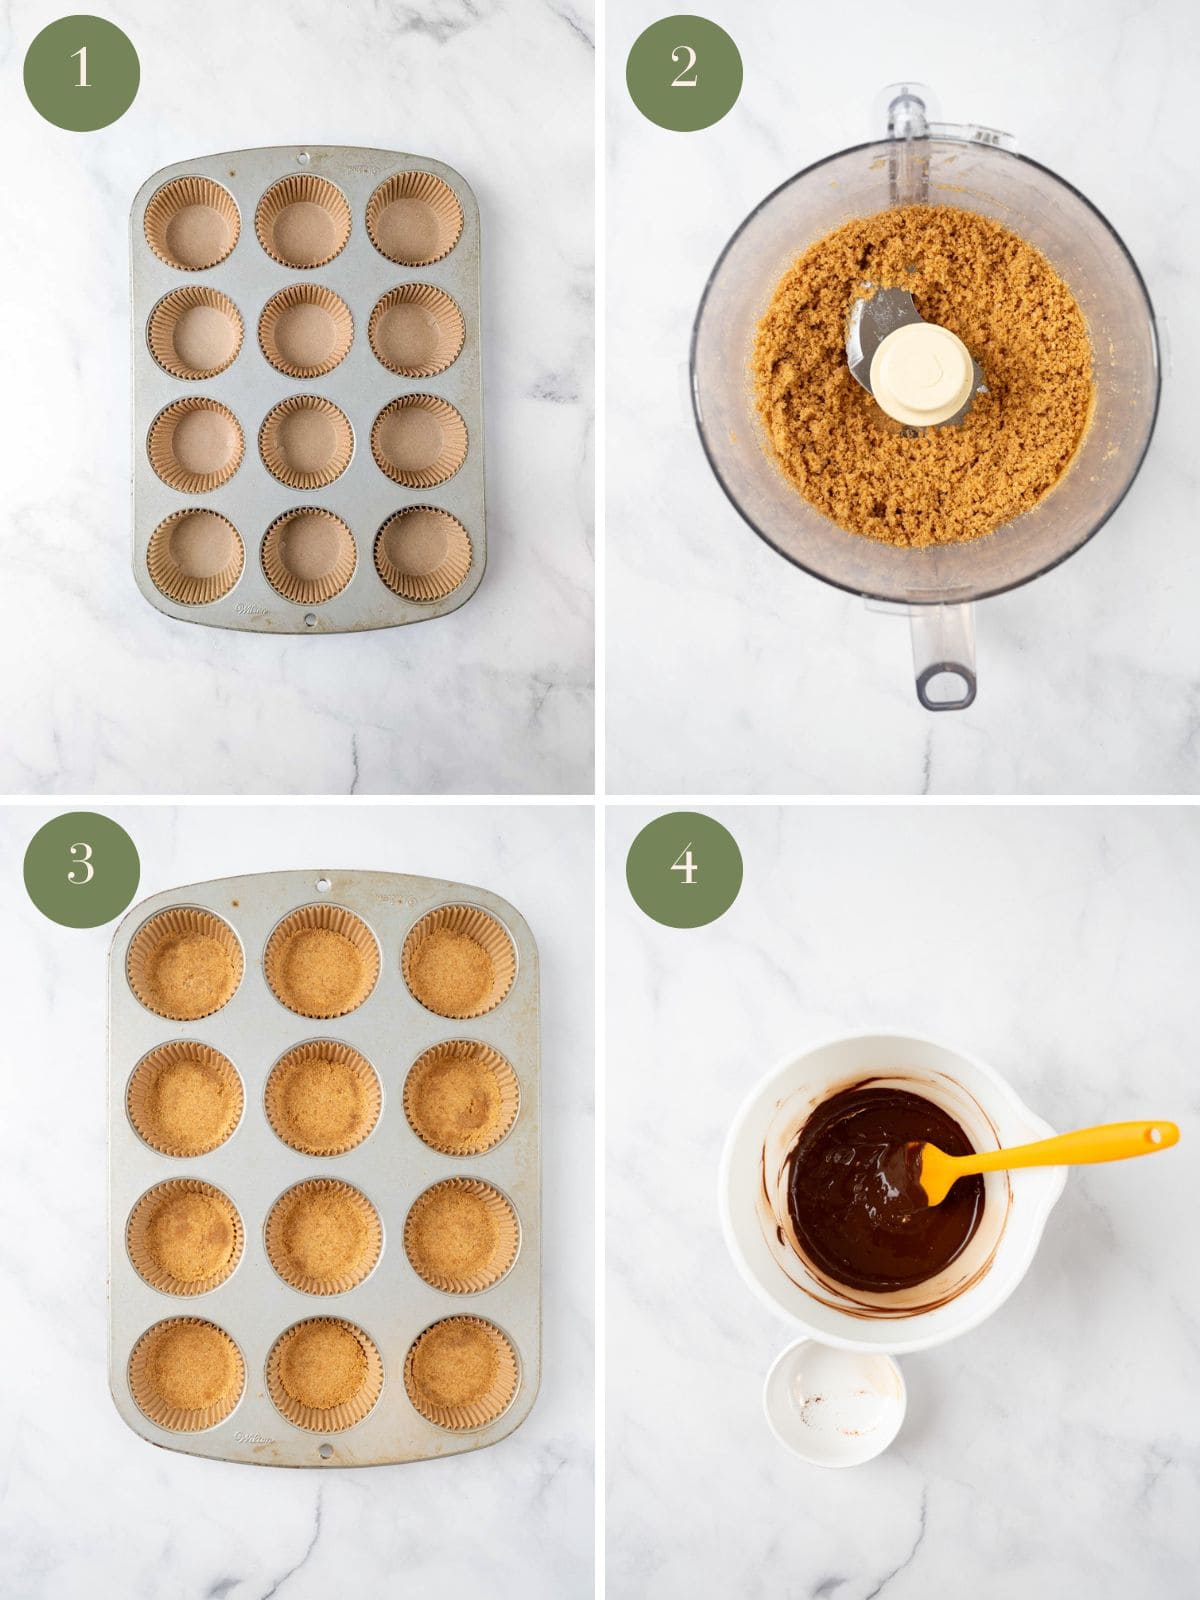
- Step 1: Prepare the Oven and Pan: Preheat the oven to 325°F. Line a standard 12-cup muffin tin with paper liners.
- Step 2: Make the Cinnamon Graham Crust: In a food processor, pulse the graham crackers until they form fine, even crumbs. Add the sugar, salt, and melted butter and pulse until the mixture is evenly moistened. The texture should resemble wet sand. If you do not have a food processor, place the crackers in a sealed bag and crush them with a rolling pin before mixing with the remaining crust ingredients.
- Step 3: Form and Pre-Bake the Crusts: Spoon about 1½ tablespoons of crumb mixture into each liner. Press firmly into an even layer using the bottom of a small glass, measuring cup, or tart tamper. Bake the crusts for 5 minutes, then remove from the oven and allow them to cool slightly. Leave the oven on.
- Step 4: Melt the Chocolate and Bloom the Spices: Place the chopped chocolate in a heatproof bowl. Microwave in 20-second intervals, stirring after each interval until smooth and fully melted. Alternatively, melt the chocolate using a double boiler. Stir the cinnamon, cloves (if using), cayenne, and kosher salt into the warm melted chocolate. Set aside to cool slightly while you prepare the cheesecake batter.
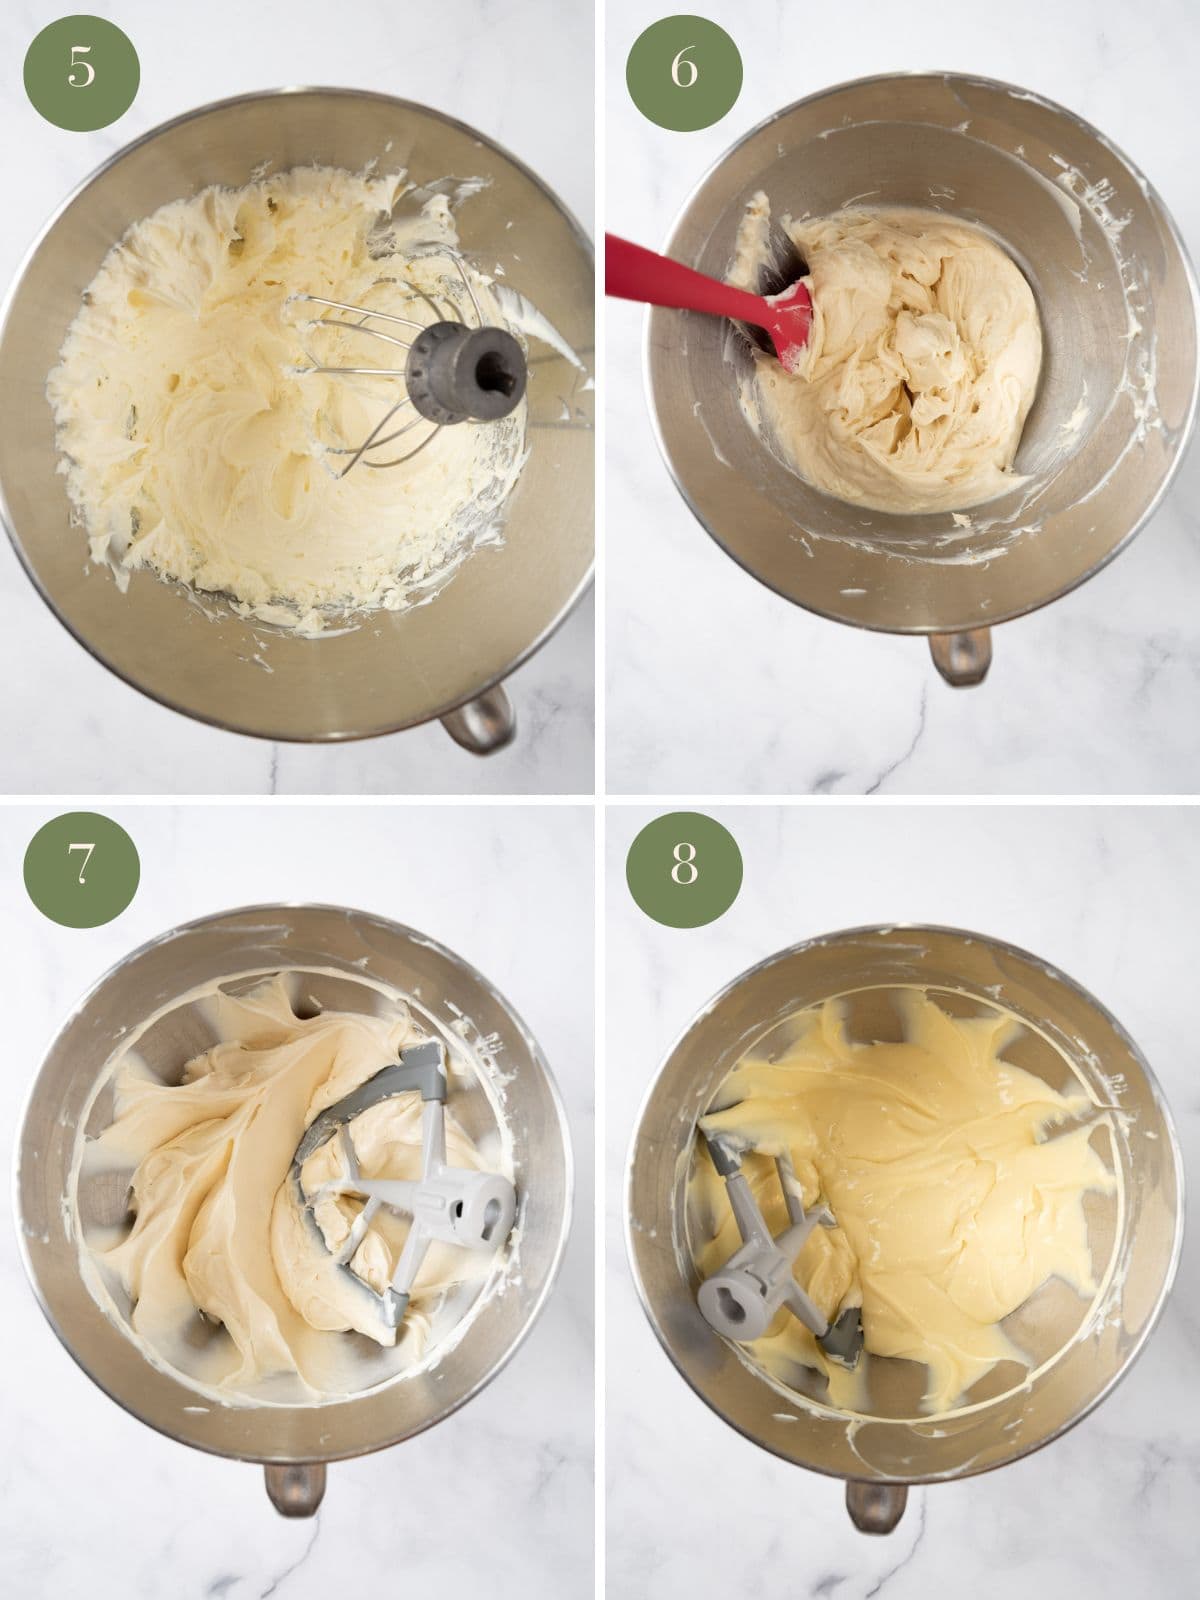
- Step 5: Beat the Cream Cheese: In a large bowl, beat the cream cheese with an electric mixer on medium speed for 2-3 minutes, until completely smooth and creamy with no lumps. Scrape down the sides and bottom of the bowl as needed.
- Step 6: Add the Sugars: Add the granulated sugar and brown sugar. Beat for 1-2 minutes, until fully incorporated and the mixture looks light and creamy.
- Step 7: Mix in Sour Cream and Vanilla: Add the sour cream and vanilla extract. Mix on low speed until smooth and well combined, about 30 seconds.
- Step 8: Add the Eggs: Add the eggs one at a time, mixing on low speed after each addition just until incorporated. Avoid overmixing at this stage, as too much air in the batter can cause cheesecakes to crack. Scrape the bowl and give the batter a final gentle stir to ensure everything is evenly combined.
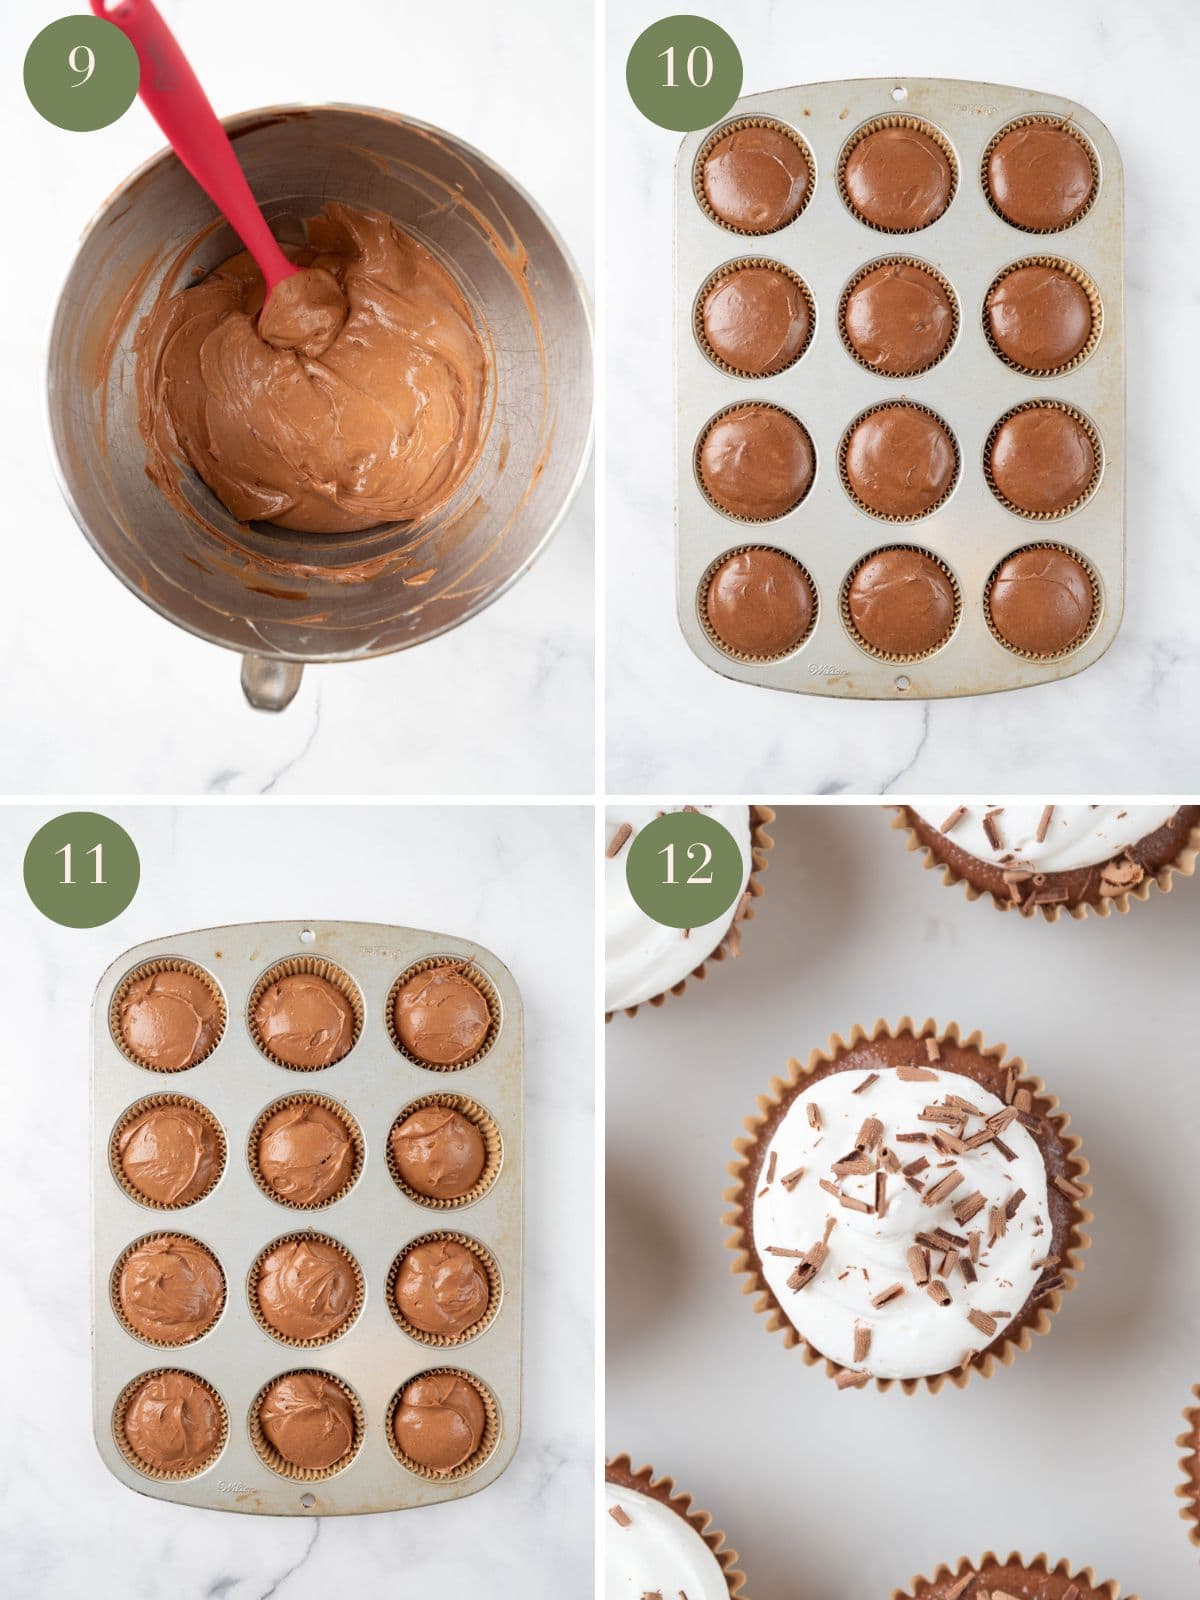
- Step 9: Mix in the Melted Chocolate: Pour the slightly cooled chocolate mixture into the batter. Mix on low speed just until the batter is evenly combined and uniformly chocolate-colored. Do not overmix.
- Step 10: Fill the Muffin Cups: Divide the cheesecake batter evenly among the 12 liners, filling each about ¾ full. Gently tap the pan on the counter 2-3 times to release any air bubbles.
- Step 11: Bake: Bake for 17-22 minutes. The cheesecakes are done when the edges are set, but the centers still jiggle slightly when the pan is gently shaken. The centers should not look wet or liquid.
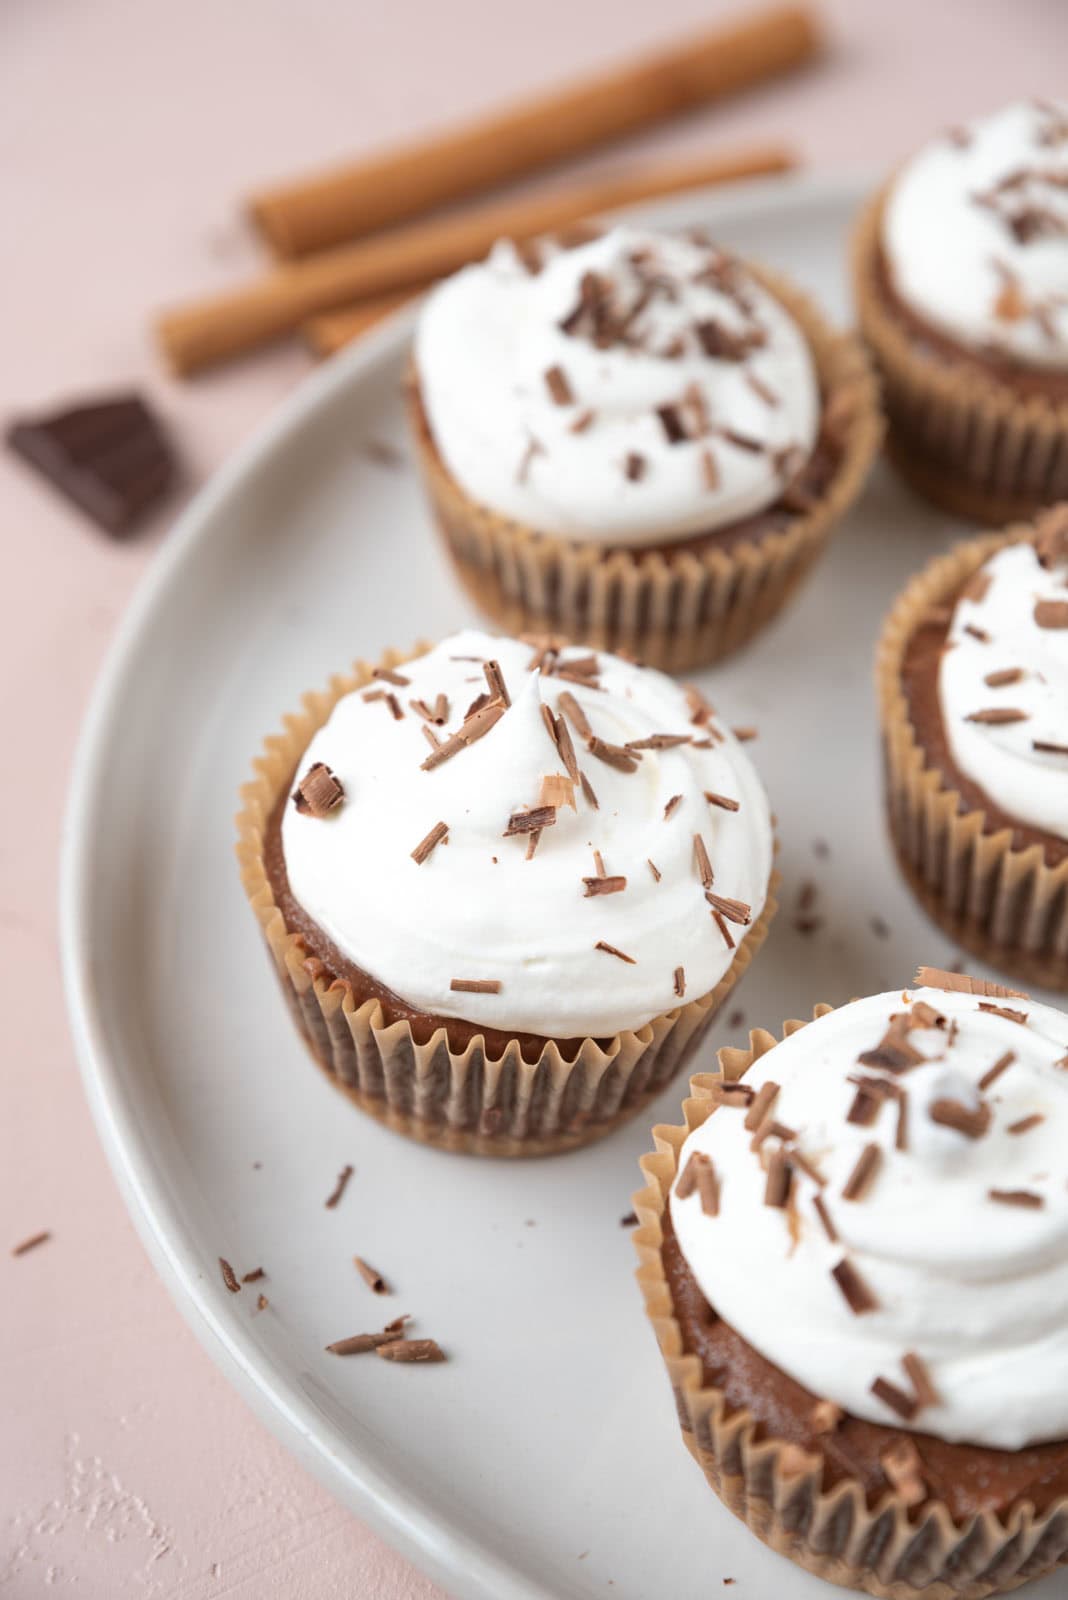
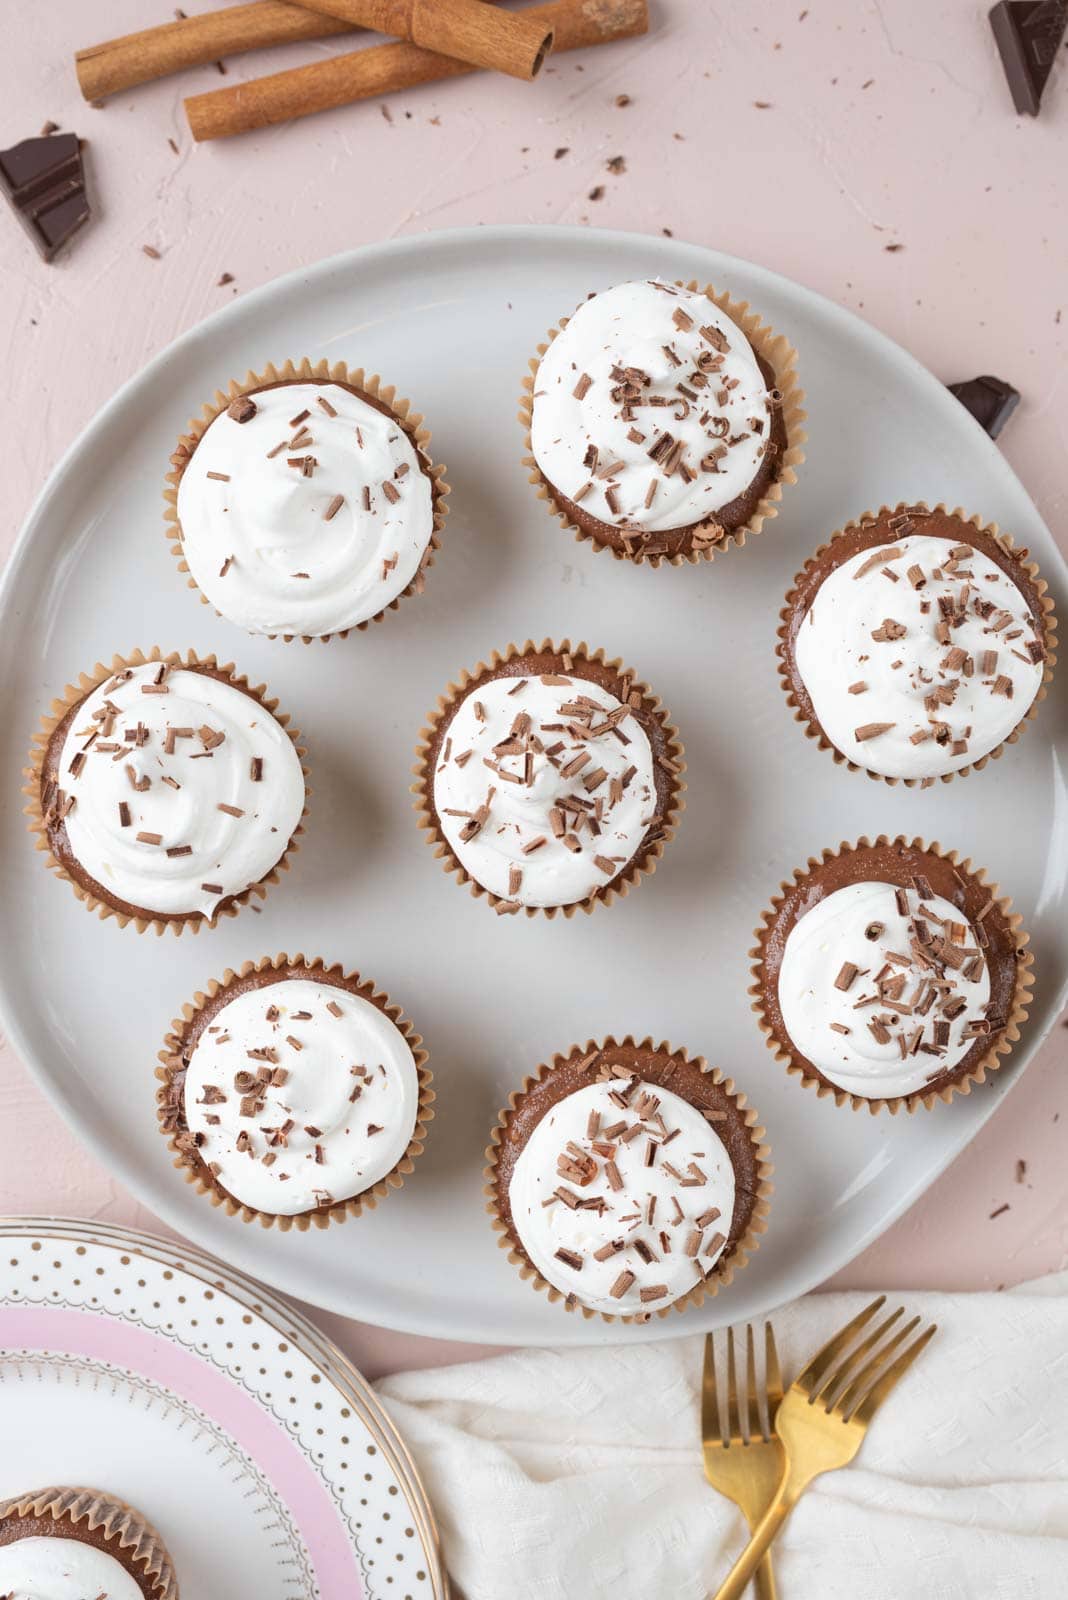
- Step 12: Cool, Chill & Serve: Remove the pan from the oven and allow the cheesecakes to cool completely at room temperature on a wire rack, about 1 hour. Once cooled, cover the pan with plastic wrap or transfer the cheesecakes to an airtight container. Refrigerate for at least 4 hours, preferably overnight, to allow the texture to set fully. Before serving, garnish with whipped cream and chocolate shavings, if desired.
Top Tips for Perfect Mini Cheesecakes
- Room Temperature Ingredients Are Critical: Room temperature ingredients are non-negotiable. You'll have lumpy cheesecakes if they are cold. Read more about it here.
- Beat cream cheese until fully smooth: Be sure the cream cheese is smooth before adding anything else. This can take anywhere from 2 to 5 minutes, depending on your mixer.
- Don't Overmix Once Eggs Are Added: Overmixing incorporates too much air, which leads to cracks and a less creamy texture. Mix on low speed and only until just combined.
- The Jiggle Test: The centers should jiggle like Jell-O when gently shaken. They'll look slightly underdone, and that's perfect. They firm up during chilling.
- Chill Thoroughly: Don't rush the chilling time. Four hours is the minimum; overnight is better. The texture transforms into creamy, silky cheesecake.
- Freeze the Crust: For an extra-sturdy base, freeze the pre-baked crusts for 10 minutes before adding the filling.
- Liners: Foil liners release more easily than paper.
Storage Instructions for Mini Cheesecakes
- Refrigerator: Store mini cheesecakes in an airtight container in the refrigerator for up to 5 days. For best results, add whipped cream topping just before serving.
- Freezer: These freeze beautifully. Freeze un-topped cheesecakes in a single layer on a baking sheet until solid (about 2 hours), then transfer to a freezer-safe container or bag, separating layers with parchment paper. Freeze for up to 3 months. Thaw overnight in the refrigerator, and add fresh whipped cream or other toppings just before serving.
- Make-Ahead Strategy: Bake the mini chocolate cheesecakes 1-2 days ahead and refrigerate, or bake and freeze up to a month ahead. The flavors actually deepen and improve after a day in the fridge.
Substitutions & Variations
- Chocolate:
- Use semi-sweet chocolate for a sweeter, milder version
- Try Mexican chocolate tablets (Abuelita or Ibarra brand) for authentic flavor. Use 6 ounces and reduce the cinnamon to ½ teaspoon, as the chocolate discs are pre-spiced.
- I'll warn against being tempted to add cocoa powder to this recipe. Mini cheesecakes can easily become dry. This recipe is so good because it has a perfect cheesecake texture, but the addition of cocoa powder would make a drier cheesecake filling. If you need a bigger punch of chocolate, use one of the chocolate crust or topping options mentioned below.
- Spice Adjustments:
- Omit cayenne or cloves entirely if you prefer
- Add ½ teaspoon espresso powder to the melted chocolate to enhance the chocolate flavor
- Use ¼ teaspoon of nutmeg instead of cloves
- Crust Variations:
- Chocolate graham cracker crust
- Oreo cookie crust
- Chocolate cookie crust (like Nabisco Famous Wafers)
- Gingersnap crust for extra spice
- Pretzel crust for sweet-salty contrast
- Flavor Boosters:
- Fold in 2 ounces of chopped dark chocolate for pockets of chocolate crunch
- Add a swirl of cajeta (traditional Mexican caramel sauce) to each before baking
Dietary Variations
- Gluten-Free: Use gluten-free chocolate cookies or gluten-free graham crackers for the crust. Ensure all other ingredients are certified gluten-free (most are naturally).
- Lower Sugar: Substitute half the granulated sugar with erythritol or monk fruit sweetener (use a 1:1 baking blend). Results will be slightly less smooth but still delicious.
- Reduced Fat: This is challenging with cheesecake, but you can use ⅓-less-fat cream cheese (not fat-free) and reduced-fat sour cream. The texture will be less rich and creamy, but still good. Do not substitute low-fat for full-fat. The cheesecakes won't set properly.
- Dairy-Free/Vegan: Use dairy-free cream cheese (Kite Hill or Violife brands work well), coconut cream in place of sour cream, and aquafaba or egg replacer for the eggs. Use dairy-free dark chocolate and vegan butter. Results vary by brand; expect a slightly different texture.
- Keto-Friendly: Replace the cookie crust with an almond flour and butter crust (1¼ cups almond flour, 3 tablespoons melted butter, 2 tablespoons keto sweetener, 2 tablespoons cocoa powder). Use a keto-approved sweetener like erythritol for the filling (¾ cup). Use sugar-free chocolate (Lily's brand). Texture and flavor will be different.
Equipment Needed for Mini Cheesecakes
- 12-cup standard muffin tin
- Muffin liners (paper, foil, or tulip-style parchment)
- Mixing bowls (medium and large)
- Electric mixer (hand mixer or stand mixer)
- Rubber spatula for scraping bowls
- Microwave-safe bowl or double boiler for melting chocolate
- Measuring cups and spoons
- Small glass or tart tamper for pressing crusts
- Food processor (optional, for making crumbs for crust)
- Wire cooling rack
- Plastic wrap or an airtight container for storage
- Piping bag with star tip (optional, for whipped cream)
- Kitchen scale (optional but helpful for precision)
Serving Suggestions for Mini Mexican Hot Chocolate Cheesecakes
Serve chilled, but let sit at room temperature for 10-15 minutes before serving for the creamiest texture.
Top with:
- Lightly sweetened whipped cream
- Dark chocolate shavings
- A light dusting of cinnamon or cocoa powder
- A drizzle of chocolate ganache
- A tiny pinch of flaky sea salt
- Cajeta, traditional Mexican caramel sauce
Serve with:
- Ice Cream: vanilla bean, cinnamon, or dulce de leche ice cream.
- Coffee: espresso or your favorite coffee.
Mini Chocolate Cheesecakes FAQs -
No. The cayenne adds warmth, not heat.
You can, but the flavor will be much sweeter and less complex. The dark chocolate's bitterness balances the spices and creates a more sophisticated flavor profile.
Yes! Use a mini cheesecake pan with removable bottoms, or use 6 8-oz ramekins filled ¾ full. Adjust baking time as needed; ramekins may need 3-5 minutes longer.
No! That's one of the benefits of mini cheesecakes. The smaller size and shorter baking time mean they bake evenly without one.
Love This Mini Mexican Hot Chocolate Cheesecakes Recipe? Please tag @poppytrailtable on Instagram and Facebook and leave a star rating⭐ ⭐ ⭐ ⭐ ⭐ and review below! Thank you!
Recent Recipes:
Looking for more recipes to enjoy? Try these:


Recipe
Mini Mexican Hot Chocolate Cheesecakes | Easy Muffin Pan Recipe
Equipment
- 12-cup standard muffin tin
- Muffin liners (paper, foil, or tulip-style parchment)
- Mixing bowls (medium and large)
- Electric mixer (hand mixer or stand mixer)
- Rubber spatula for scraping bowls
- Microwave-safe bowl or double boiler for melting chocolate
- Measuring cups and spoons
- Small glass or tart tamper for pressing crusts
- Food processor (optional, for making crumbs for crust)
- Wire cooling rack
- Plastic wrap or an airtight container for storage
- Piping bag with star tip (optional, for whipped cream)
- Kitchen scale (optional but helpful for precision)
Ingredients
Cinnamon Graham Cracker Crust
- 1 cup finely crushed cinnamon graham crackers about 8 full crackers
- 2 tablespoons granulated sugar
- 4 tablespoons unsalted butter melted
- Pinch kosher salt
Chocolate Cheesecake Filling
- 16 ounces full-fat cream cheese room temperature
- ½ cup granulated sugar
- ¼ cup light brown sugar
- 6 ounces dark chocolate 70-85%, melted and slightly cooled
- 2 large eggs room temperature
- ½ cup sour cream room temperature
- ½ teaspoon vanilla extract
- 1 teaspoon ground cinnamon
- ¼ teaspoon ground cloves optional
- ⅛ teaspoon cayenne or ancho chili powder optional
- ¼ teaspoon kosher salt
Instructions
- Step 1: Prepare the Oven and Pan: Preheat the oven to 325°F. Line a standard 12-cup muffin tin with paper liners.
- Step 2: Make the Cinnamon Graham Crust: In a food processor, pulse the graham crackers until they form fine, even crumbs. Add the sugar, salt, and melted butter and pulse until the mixture is evenly moistened. The texture should resemble wet sand. If you do not have a food processor, place the crackers in a sealed bag and crush them with a rolling pin before mixing with the remaining crust ingredients.
- Step 3: Form and Pre-Bake the Crusts: Spoon about 1½ tablespoons of crumb mixture into each liner. Press firmly into an even layer using the bottom of a small glass, measuring cup, or tart tamper. Bake the crusts for 5 minutes, then remove from the oven and allow them to cool slightly. Leave the oven on.
- Step 4: Melt the Chocolate and Bloom the Spices: Place the chopped chocolate in a heatproof bowl. Microwave in 20-second intervals, stirring after each interval until smooth and fully melted. Alternatively, melt the chocolate using a double boiler. Stir the cinnamon, cloves (if using), cayenne, and kosher salt into the warm melted chocolate. Set aside to cool slightly while you prepare the cheesecake batter.
- Step 5: Beat the Cream Cheese: In a large bowl, beat the cream cheese with an electric mixer on medium speed for 2-3 minutes, until completely smooth and creamy with no lumps. Scrape down the sides and bottom of the bowl as needed.
- Step 6: Add the Sugars: Add the granulated sugar and brown sugar. Beat for 1-2 minutes, until fully incorporated and the mixture looks light and creamy.
- Step 7: Mix in Sour Cream and Vanilla: Add the sour cream and vanilla extract. Mix on low speed until smooth and well combined, about 30 seconds.
- Step 8: Add the Eggs: Add the eggs one at a time, mixing on low speed after each addition just until incorporated. Avoid overmixing at this stage, as too much air in the batter can cause cheesecakes to crack. Scrape the bowl and give the batter a final gentle stir to ensure everything is evenly combined.
- Step 9: Mix in the Melted Chocolate: Pour the slightly cooled chocolate mixture into the batter. Mix on low speed just until the batter is evenly combined and uniformly chocolate-colored. Do not overmix.
- Step 10: Fill the Muffin Cups: Divide the cheesecake batter evenly among the 12 liners, filling each about ¾ full. Gently tap the pan on the counter 2-3 times to release any air bubbles.
- Step 11: Bake: Bake for 17-22 minutes. The cheesecakes are done when the edges are set, but the centers still jiggle slightly when the pan is gently shaken. The centers should not look wet or liquid.
- Step 12: Cool, Chill & Serve: Remove the pan from the oven and allow the cheesecakes to cool completely at room temperature on a wire rack, about 1 hour. Once cooled, cover the pan with plastic wrap or transfer the cheesecakes to an airtight container. Refrigerate for at least 4 hours, preferably overnight, to allow the texture to set fully. Before serving, garnish with whipped cream and chocolate shavings, if desired.
Notes
Top Tips for Perfect Mini Cheesecakes
- Room Temperature Ingredients Are Critical: Room temperature ingredients are non-negotiable. You'll have lumpy cheesecakes if they are cold.
- Beat cream cheese until fully smooth: Be sure the cream cheese is smooth before adding anything else. This can take anywhere from 2 to 5 minutes, depending on your mixer.
- Don't Overmix Once Eggs Are Added: Overmixing incorporates too much air, which leads to cracks and a less creamy texture. Mix on low speed and only until just combined.
- The Jiggle Test: The centers should jiggle like Jell-O when gently shaken. They'll look slightly underdone, and that's perfect. They firm up during chilling.
- Chill Thoroughly: Don't rush the chilling time. Four hours is the minimum; overnight is better. The texture transforms into creamy, silky cheesecake.
- Freeze the Crust: For an extra-sturdy base, freeze the pre-baked crusts for 10 minutes before adding the filling.
- Liners: Foil liners release more easily than paper.
Storage Instructions for Mini Cheesecakes
- Refrigerator: Store mini cheesecakes in an airtight container in the refrigerator for up to 5 days. For best results, add whipped cream topping just before serving.
- Freezer: These freeze beautifully. Freeze un-topped cheesecakes in a single layer on a baking sheet until solid (about 2 hours), then transfer to a freezer-safe container or bag, separating layers with parchment paper. Freeze for up to 3 months. Thaw overnight in the refrigerator, and add fresh whipped cream or other toppings just before serving.
- Make-Ahead Strategy: Bake the mini chocolate cheesecakes 1-2 days ahead and refrigerate, or bake and freeze up to a month ahead. The flavors actually deepen and improve after a day in the fridge.

Anonymous says
Excellent!