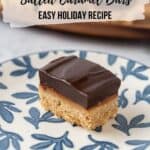
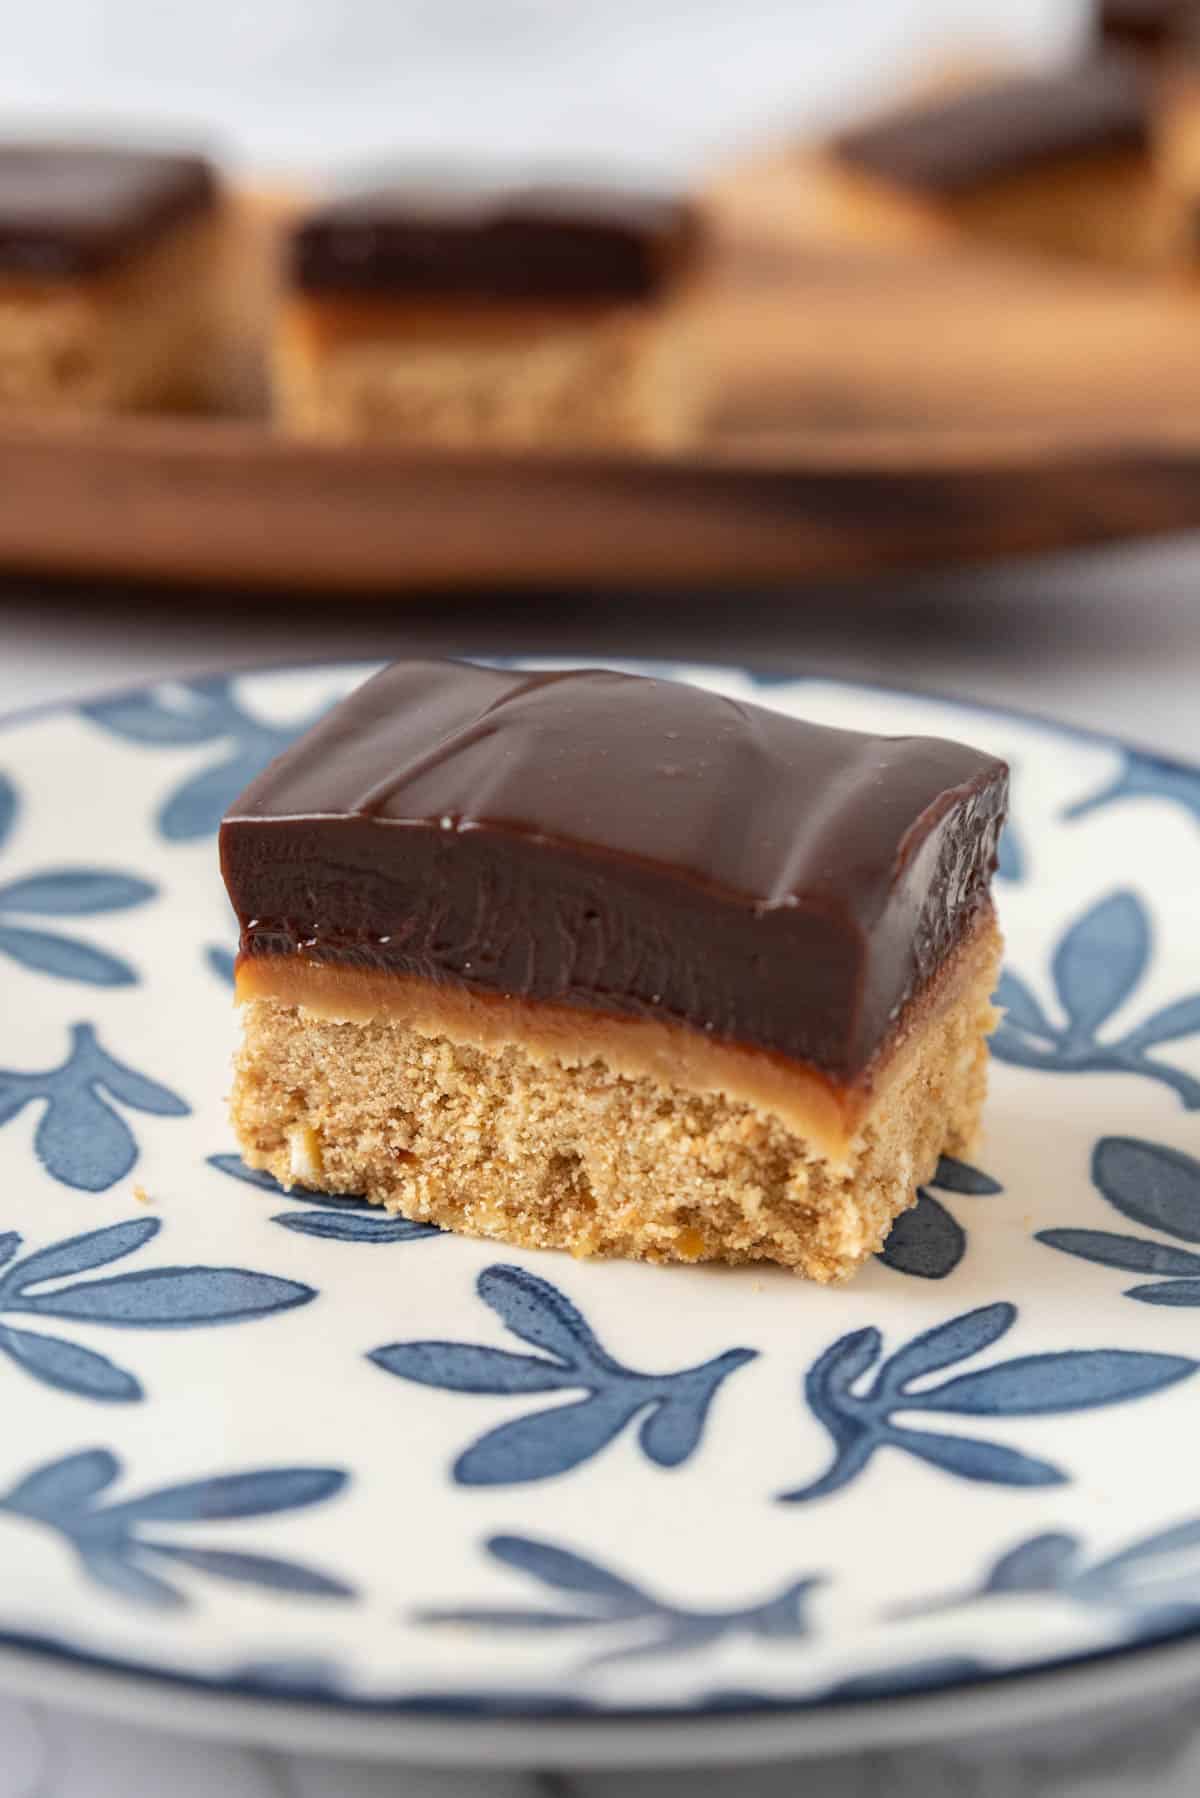
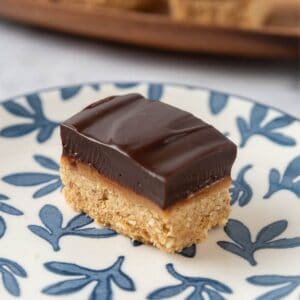
These Chocolate Espresso Salted Caramel Bars look like you picked them up in a bakery with their pretty layers and shiny chocolate finish. Each bite layers buttery pretzel-graham cracker crunch, gooey caramel, and rich dark chocolate infused with espresso powder. The texture and flavor combo is unbeatable in indulgent bars. Gift bars at the holidays, or cut these into bite-sized squares for a dessert table.
While my philosophy is always to make as many things as possible from scratch because fresh is always better, I do allow myself a big shortcut in this recipe. I use store-bought caramels. When I get out a candy thermometer to make caramel, it means it's the holiday season. I'm wearing an elf apron and listening to Gwen Stefani sing "You Make It Feel Like Christmas" on repeat. But these indulgent bars aren't just for that time of year. This dessert is perfect anytime you want to impress someone with an indulgent treat but not spend a whole lot of time doing it. I love this recipe because it looks and feels bakery-fancy, but it's really so fast and easy. I can't claim this is a no-bake recipe, but it's a "minimal-bake recipe" if that's a thing. The crust comes together in just a few minutes and bakes for just long enough to set, and the other two layers need only to chill.
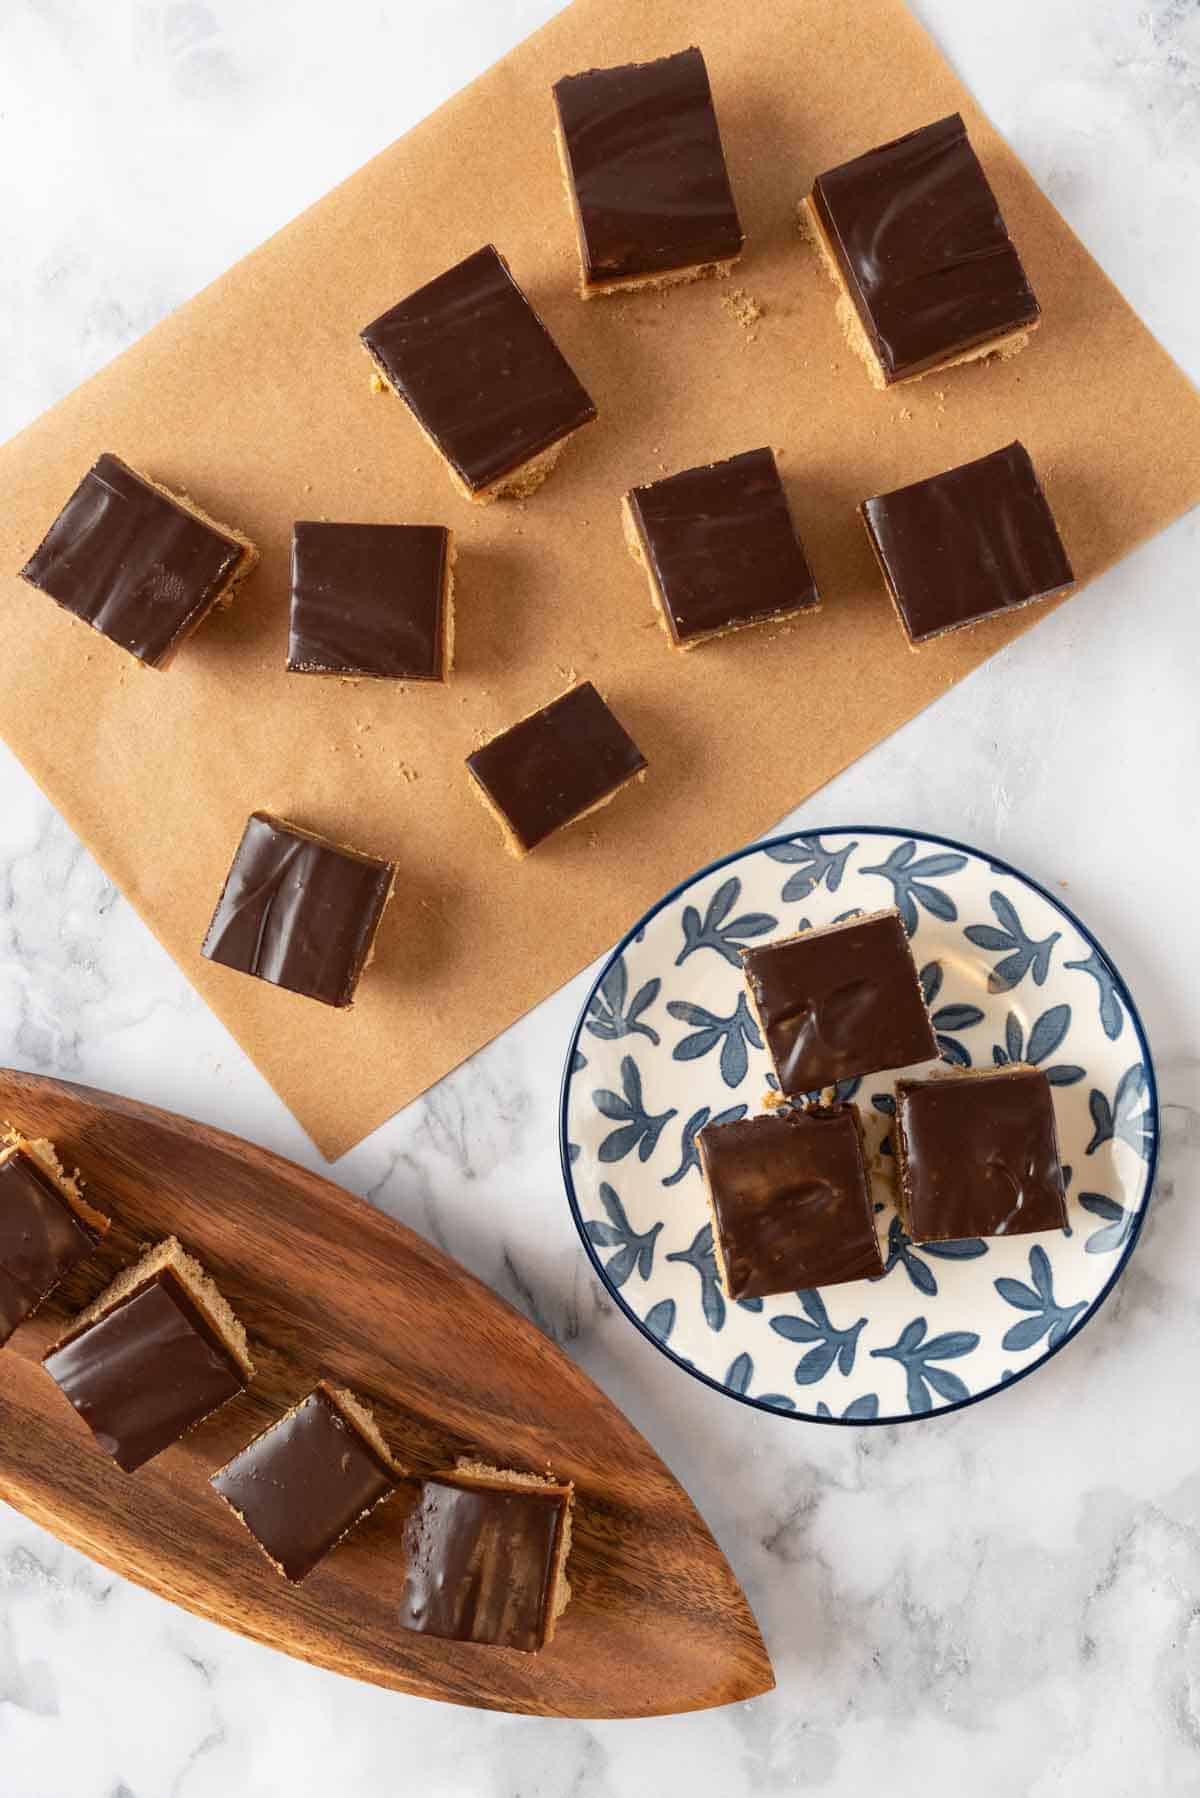
The espresso-laced chocolate topping gives the bars a bold mocha flavor that satisfies a chocolate craving in a more grown-up dessert bar. Because these bars are so rich, you can cut them into smaller bars. While a 9x9 pan usually yields 9 to 12 regular dessert bars, you can get 25 from this recipe.
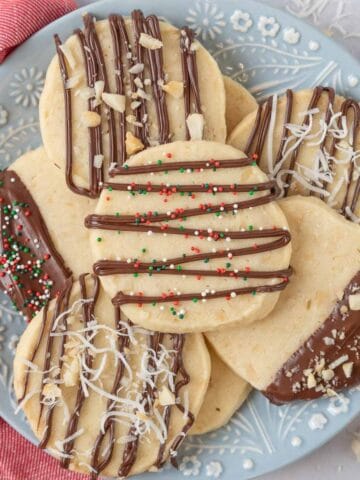
Looking for more sweet recipes? Try these: Macadamia Nut Shortbread Cookies, Brown Butter Biscoff Blondies, German Chocolate Cheesecake, and Snickerdoodle Bars with Chai Spice Frosting.
Why You'll Love These Chocolate Espresso Bars
- Sweet + Salty Balance: The combination of pretzels, caramel, and dark chocolate is dessert perfection. The sweet-saltiness of both the pretzel-graham cracker crust and the salted caramel layers, paired with the slightly bitter, bold espresso chocolate layer, hits all the right notes when you are craving a dessert treat.
- Easy to Make Ahead: These bars need to spend time in the fridge, making them ideal for entertaining. Make them a day or two ahead, and you'll have one less thing to worry about when guests arrive.
- Crowd-Pleasing Treat: These bars look fancy, but couldn't be simpler to make.
- Customizable: While the base recipe is perfect, you can easily adapt it to your preferences with different chocolates, a sprinkle of sea salt, or even a drizzle of extra caramel on top.
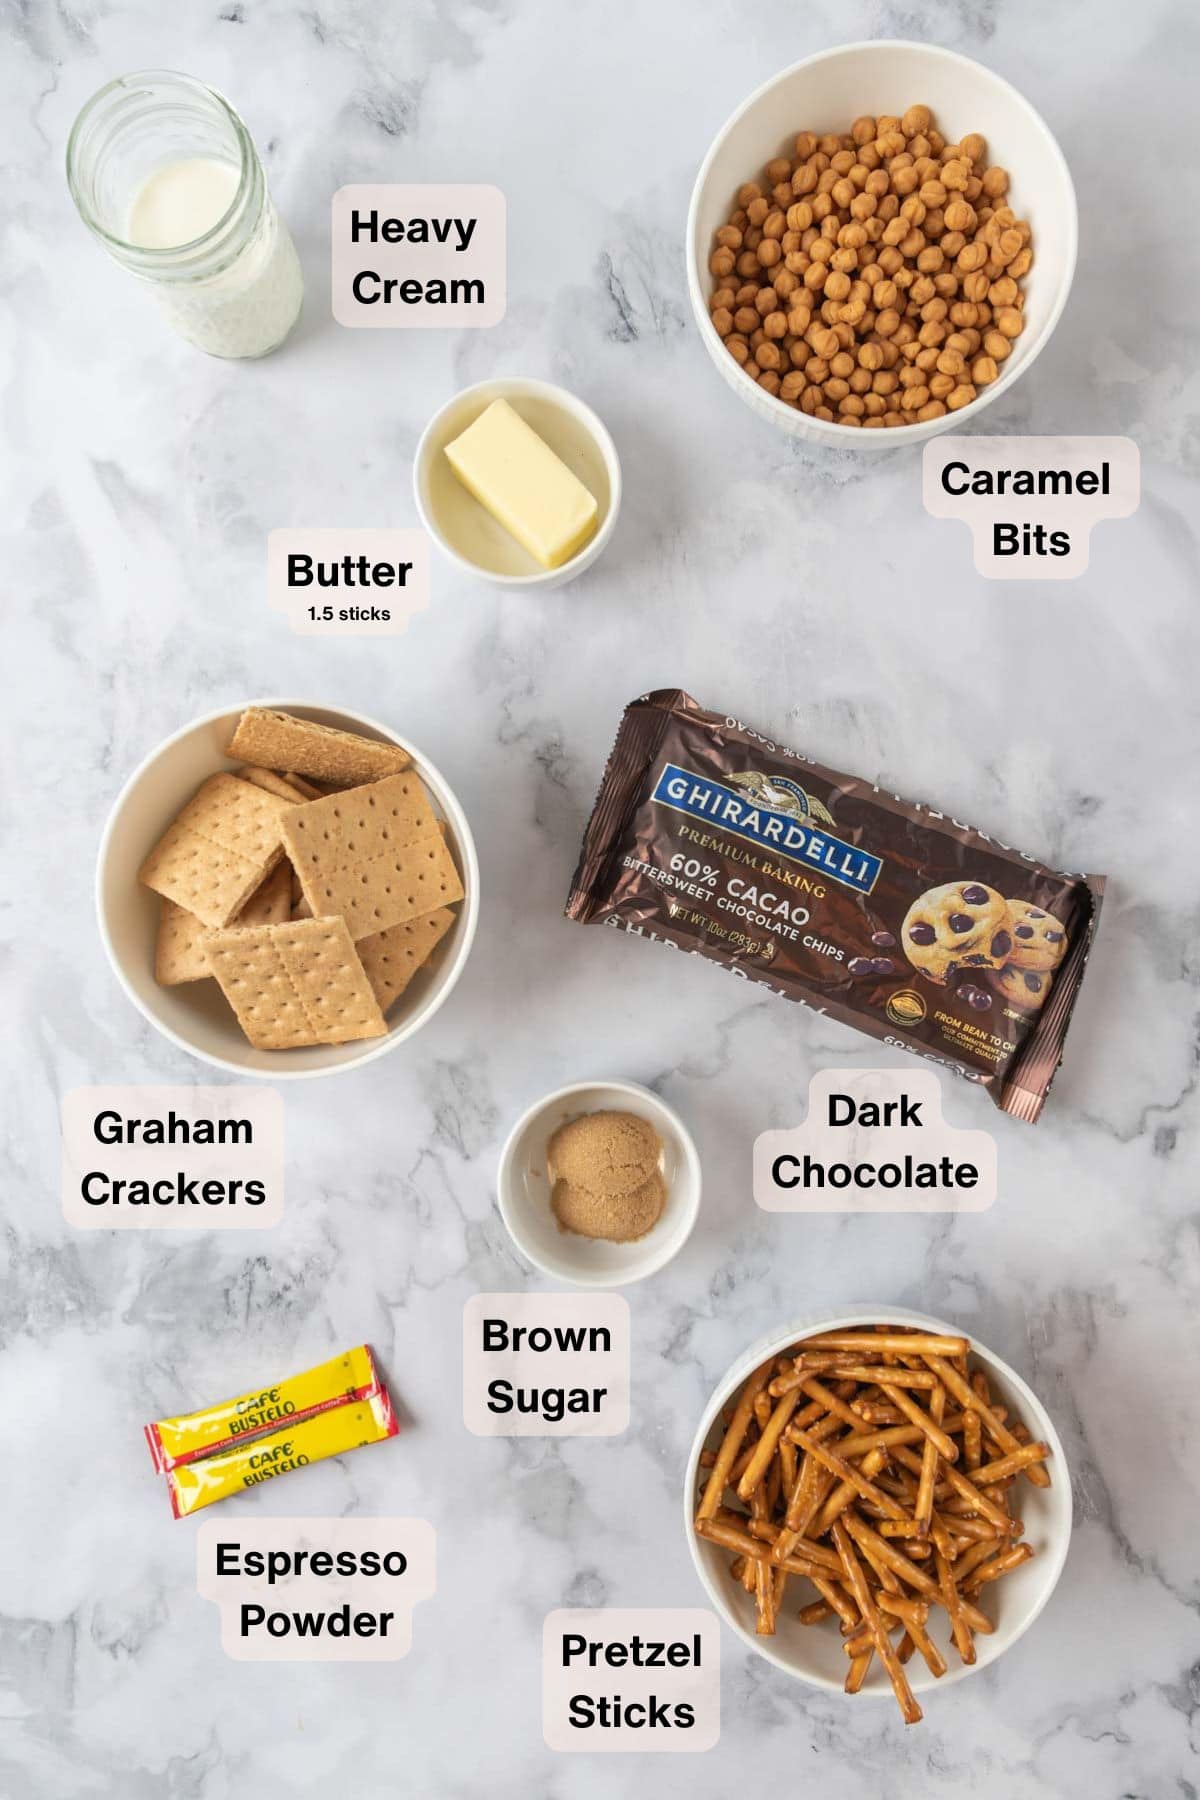
Ingredient Highlights
Crust:
- Pretzels: I use salted pretzel sticks because their crumb size tends to be more uniform than twists, but twists are perfectly fine to use. The saltiness of the pretzels is essential. It cuts through the sweetness of the other layers and really helps balance the rich chocolate layer.
- Graham Crackers: Plain honey graham crackers are best.
- Butter: I prefer unsalted butter here, as the pretzels provide salt, and a sprinkle of salt will be added to the caramel layer. The melted butter binds everything together and adds richness. Be sure it's fully melted.
- Brown Sugar: Either light or dark brown sugar works beautifully. The molasses notes in brown sugar add depth to the crust and complement the caramel layer above. It also helps the crust hold together and adds a subtle toffee quality.
Caramel Layer:
- Caramel: For this recipe, I use store-bought caramel pieces and melt them down with heavy cream. I get the perfect consistency every time and in less than two minutes.
- Heavy Cream: This is mixed with the caramel to create the perfect consistency for spreading. It also adds a luxurious, creamy texture. Don't substitute with milk. You need the fat content from heavy cream.
Chocolate Espresso Layer:
- Dark Chocolate: I recommend using chocolate that's between 60-72% cacao. This gives rich chocolate flavor without being too bitter, and it pairs perfectly with the espresso. Use good-quality chocolate. It really makes a difference and will ensure a smooth, glossy finish. You can use chocolate chips or bars, chopped into similarly sized pieces. My favorite grocery store brands are Guittard and Ghirardelli for a recipe like this, where the chocolate is really the star of the show.
- Espresso Powder: This is the secret ingredient that elevates these bars from ordinary to extraordinary. Espresso powder (not instant coffee, though that can work in a pinch) provides concentrated coffee flavor without adding liquid. It intensifies the chocolate and adds delicious, sophisticated depth. I always have Cafe Bustelo instant espresso packets on hand for baking. Each packet is one teaspoon, and it has a long shelf life.
- Heavy Cream: Creates a ganache-like topping that's smooth, glossy, and melts on your tongue. This is what transforms plain melted chocolate into something easily sliceable.
See the recipe card below for quantities.
Step-by-Step Instructions for bars
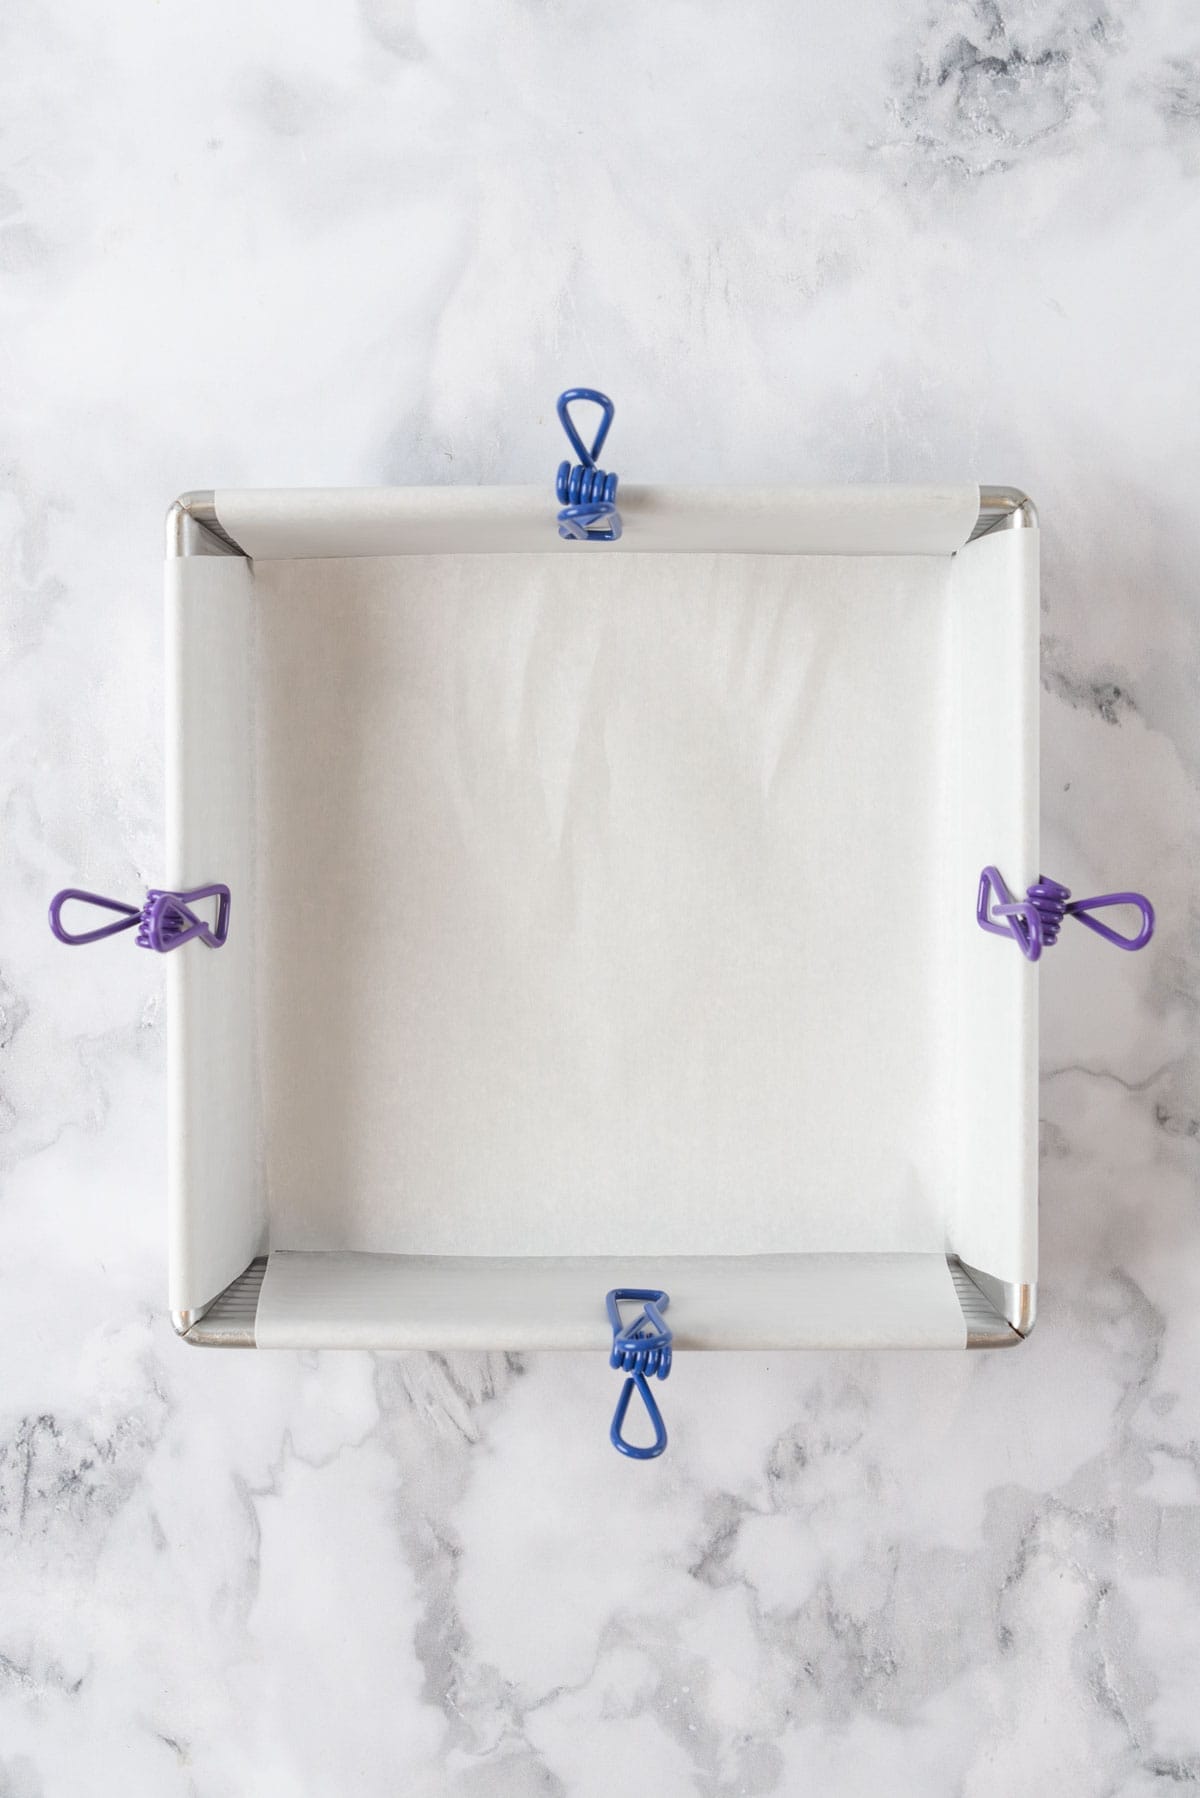
- Step 1: Preheat Oven & Prepare Pan: Preheat the oven to 350°F (175°C). Line an 8x8-inch or 9x9-inch square baking pan with parchment paper, leaving overhang on two sides to act as handles for easy removal later. You can also use aluminum foil sprayed with cooking spray. This step is crucial and makes removing the bars so much easier.
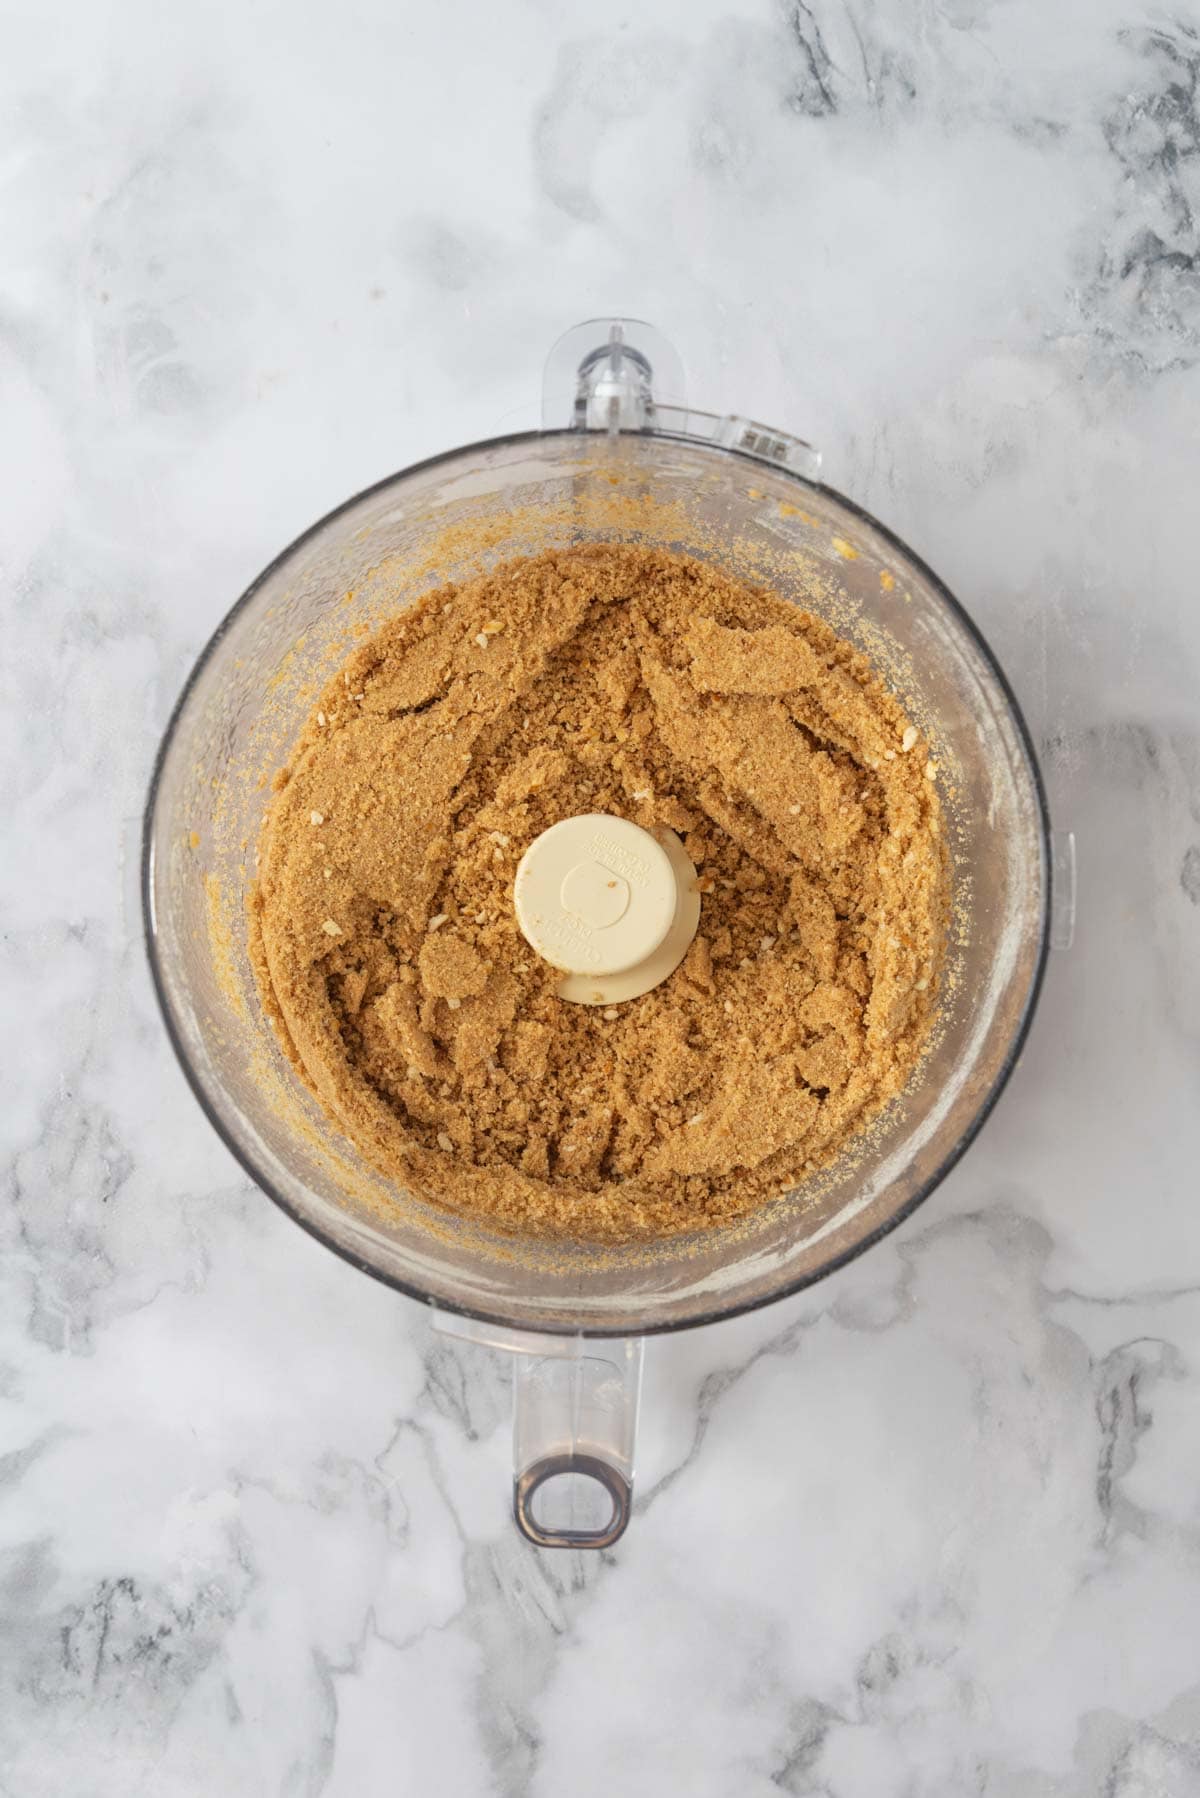
- Step 2: Make the Crust Layer: In a food processor, pulse pretzels and graham cracker crumbs until finely crushed. Add melted butter and brown sugar, then pulse again until the mixture resembles wet sand. Press firmly into the prepared pan in an even, flat layer. You want a compact, even layer that won't crumble apart later. Bake in preheated oven for 10-12 minutes until the crust is set and just beginning to turn golden at the edges. Remove from the oven and allow it to cool while preparing the caramel.
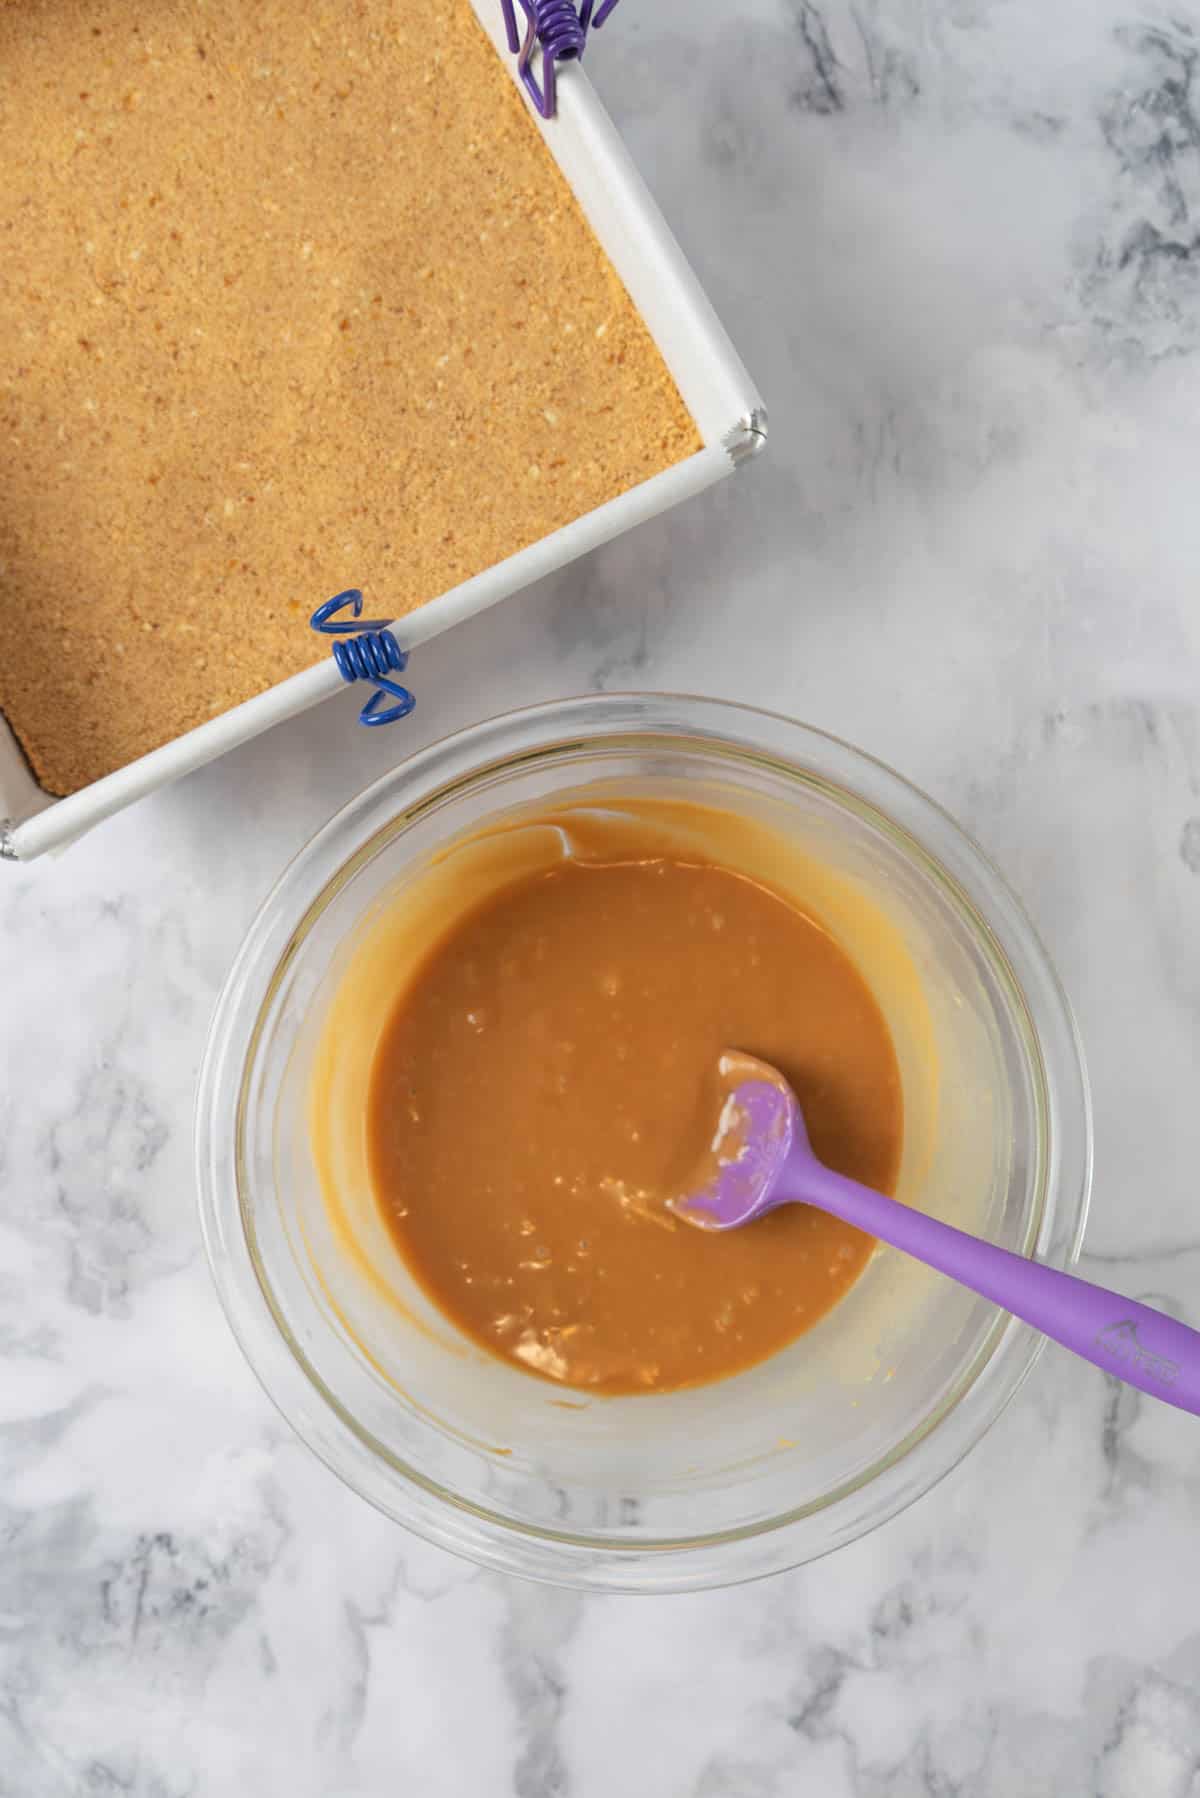
- Step 3: Make the Caramel Layer: Add 2 tablespoons of heavy cream and soft caramel squares or bits to a microwave-safe glass mixing bowl, microwave for 30 seconds, then stir. Continue to heat and stir in 15-second increments until smooth and slightly thinned, adding an additional tablespoon of heavy cream during the process, if necessary, to achieve a smooth and pourable caramel. *Alternatively, use a double-boiler setup on the stove top. Place soft caramel squares or bits and heavy cream in a heat-safe glass mixing bowl that fits over a saucepan with 1 ½ inches of water. Heat over low, stirring frequently, until completely melted and smooth. This takes about 5 minutes.
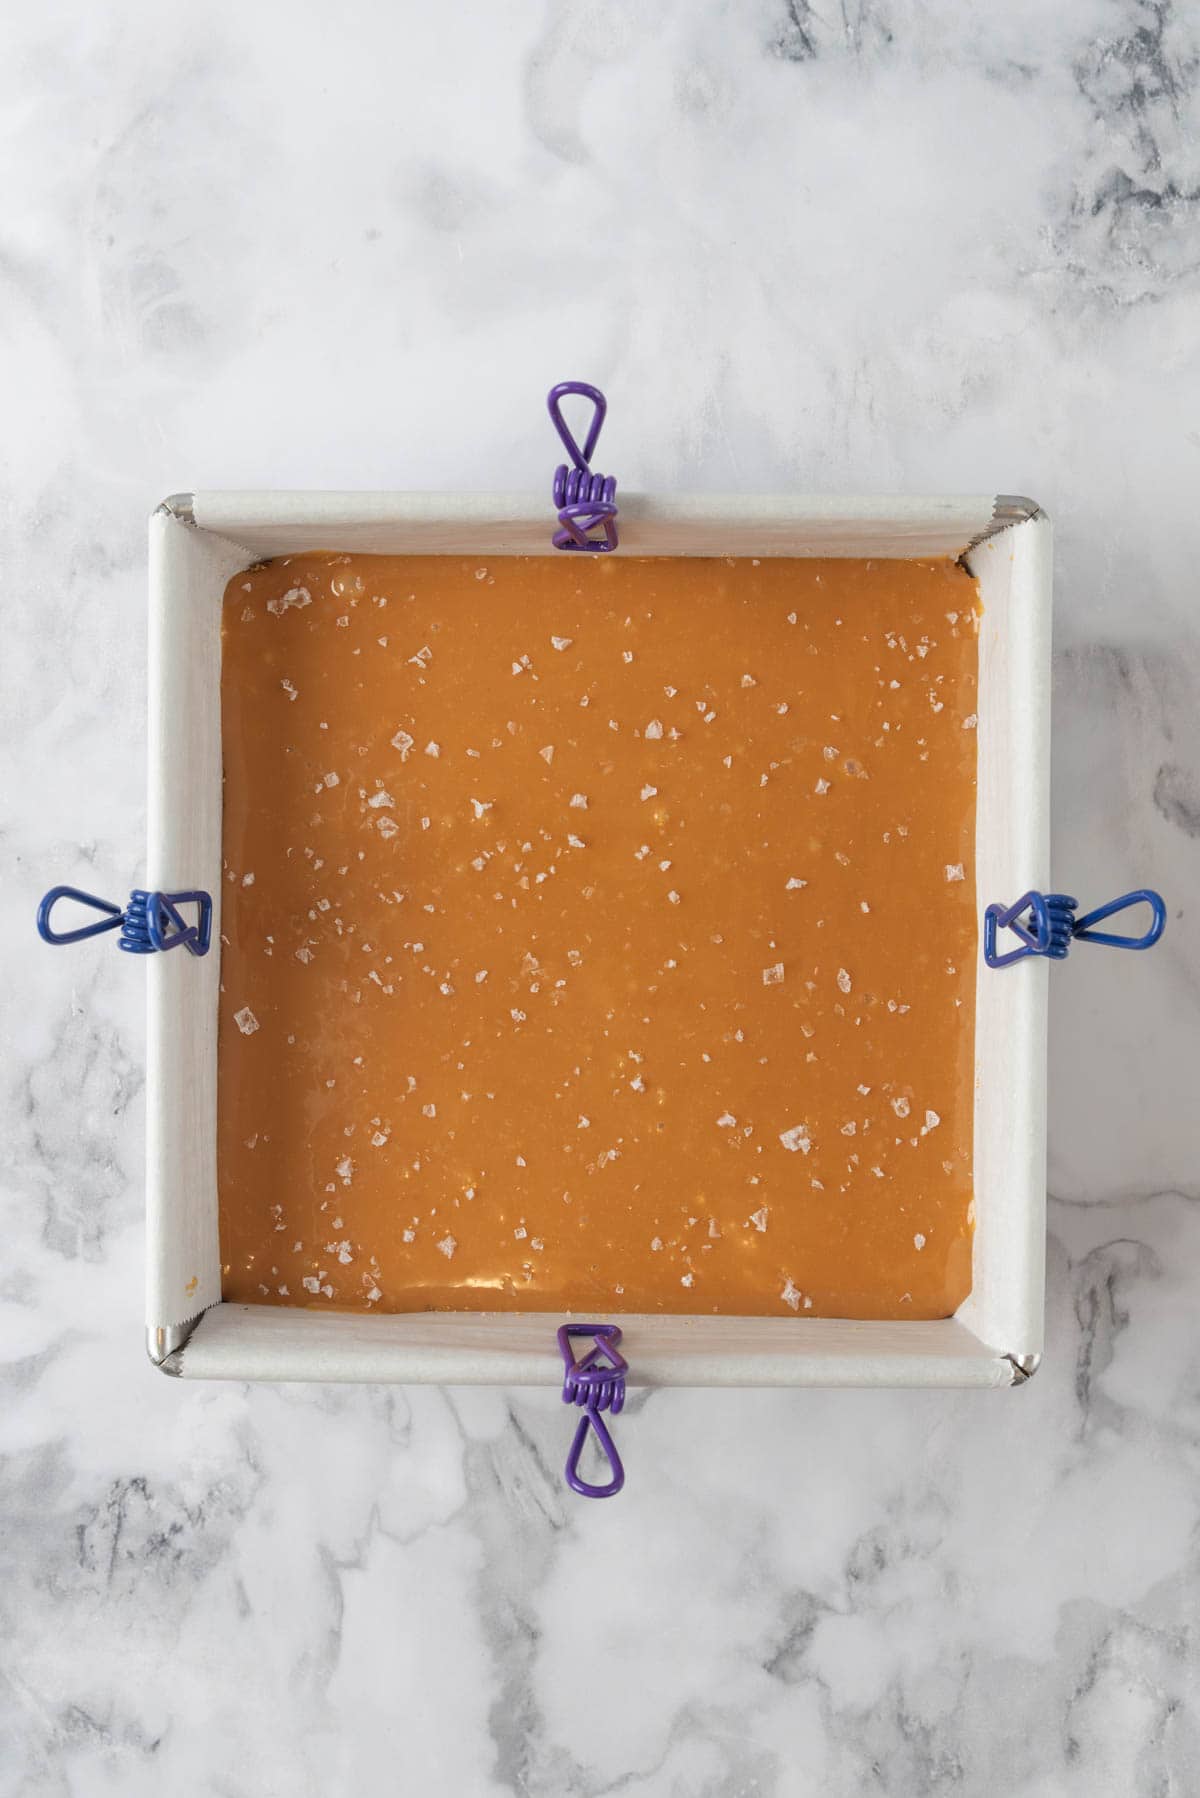
- Step 4: Pour & Set Caramel Layer: Pour caramel over the slightly cooled crust and use an offset spatula or rubber spatula to spread it evenly to the edges. Sprinkle with flaky sea salt and allow to cool while preparing the chocolate layer. Be sure it is slightly firm to the touch before moving on to the next step and pouring the chocolate layer. Place in the refrigerator or freezer for a few minutes, if necessary, to firm it up.
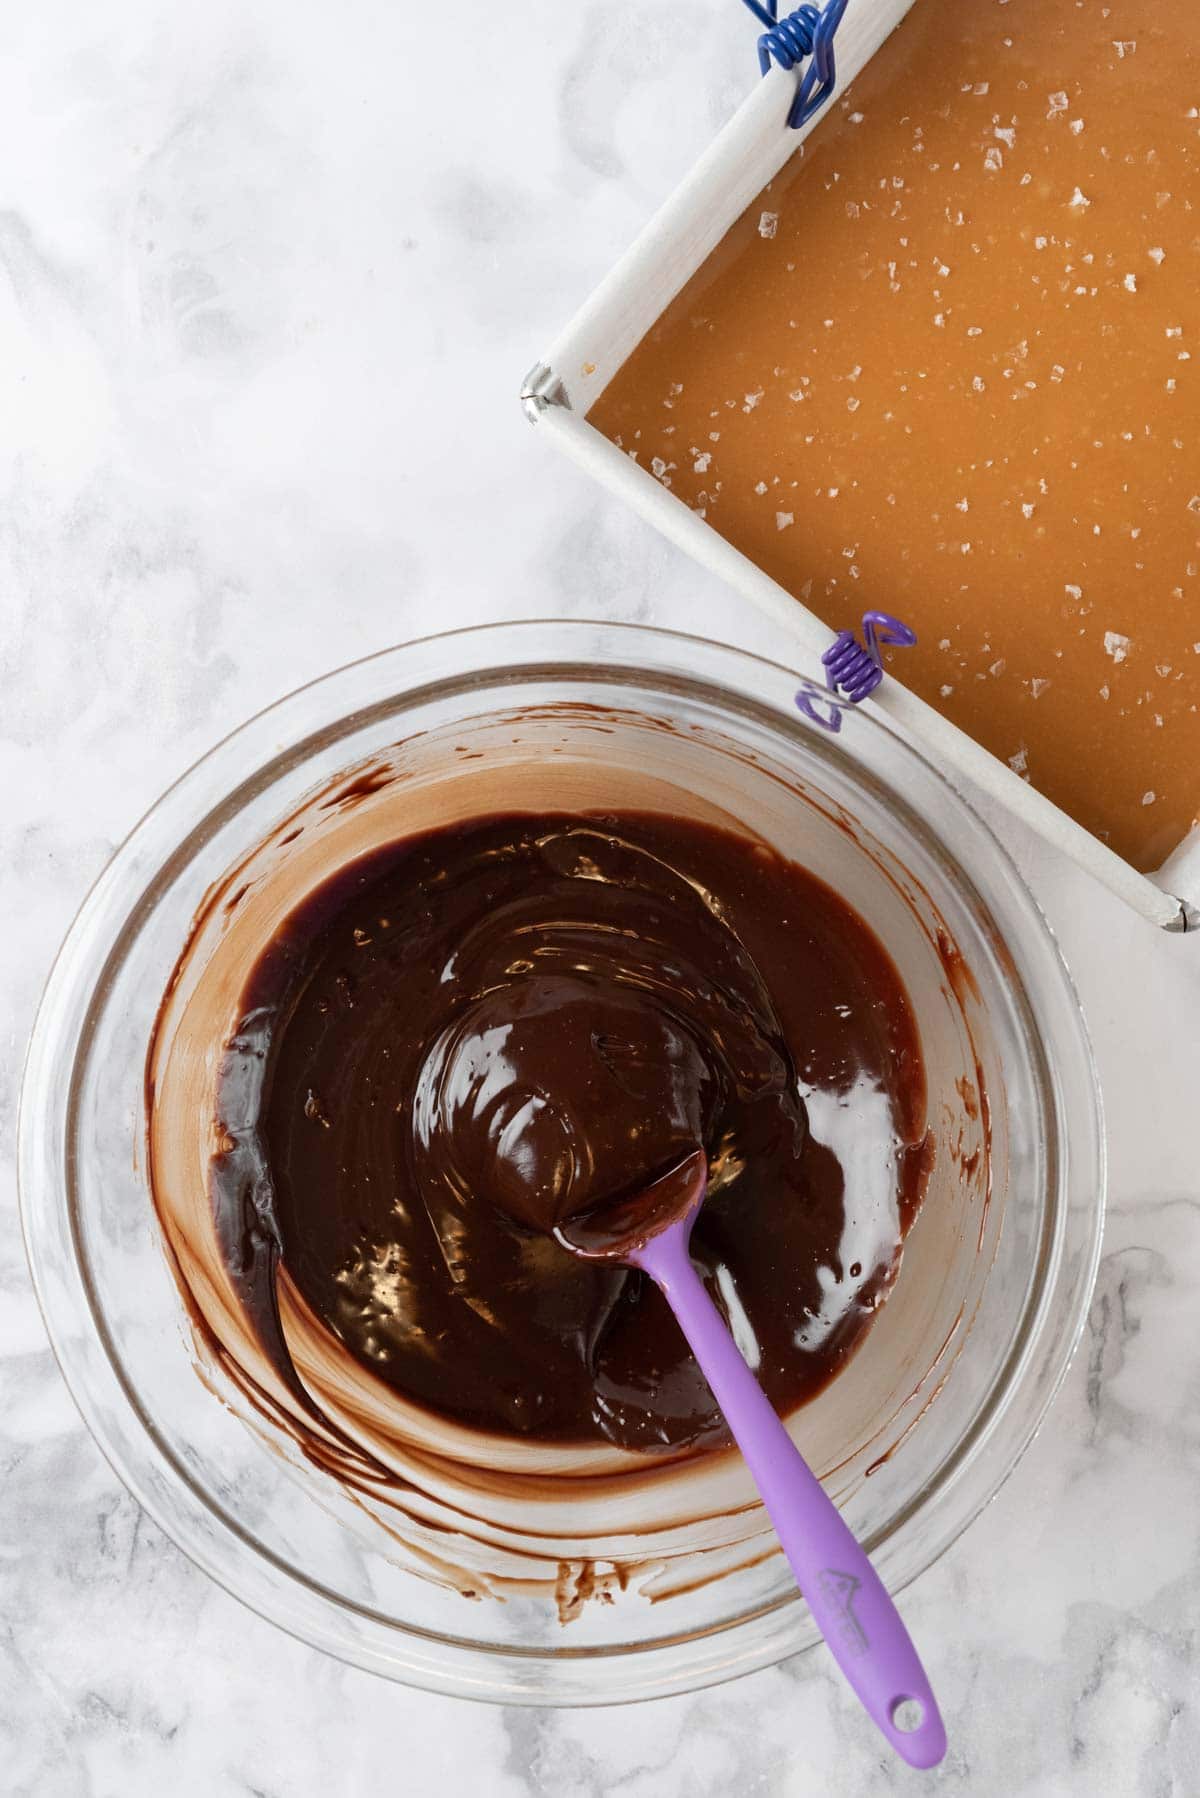
- Step 5: Make the Chocolate Espresso Ganache: Chop chocolate into small, uniform pieces if using chocolate bars instead of chips. Place the chocolate in a heatproof bowl. Heat heavy cream in a small saucepan until it just begins to simmer. You'll see small bubbles around the edges. Do not let it boil. Remove from heat and stir in the espresso powder until dissolved. Pour the hot cream mixture over the chocolate and let it sit for 2 minutes without stirring. This allows the chocolate to melt evenly. After 2 minutes, whisk gently from the center outward until the mixture is completely smooth and glossy. Let the ganache cool for 3 to 4 minutes, stirring occasionally. You want it to thicken slightly but still be pourable. If it gets too thick, you can microwave it for 10-15 seconds to loosen it.
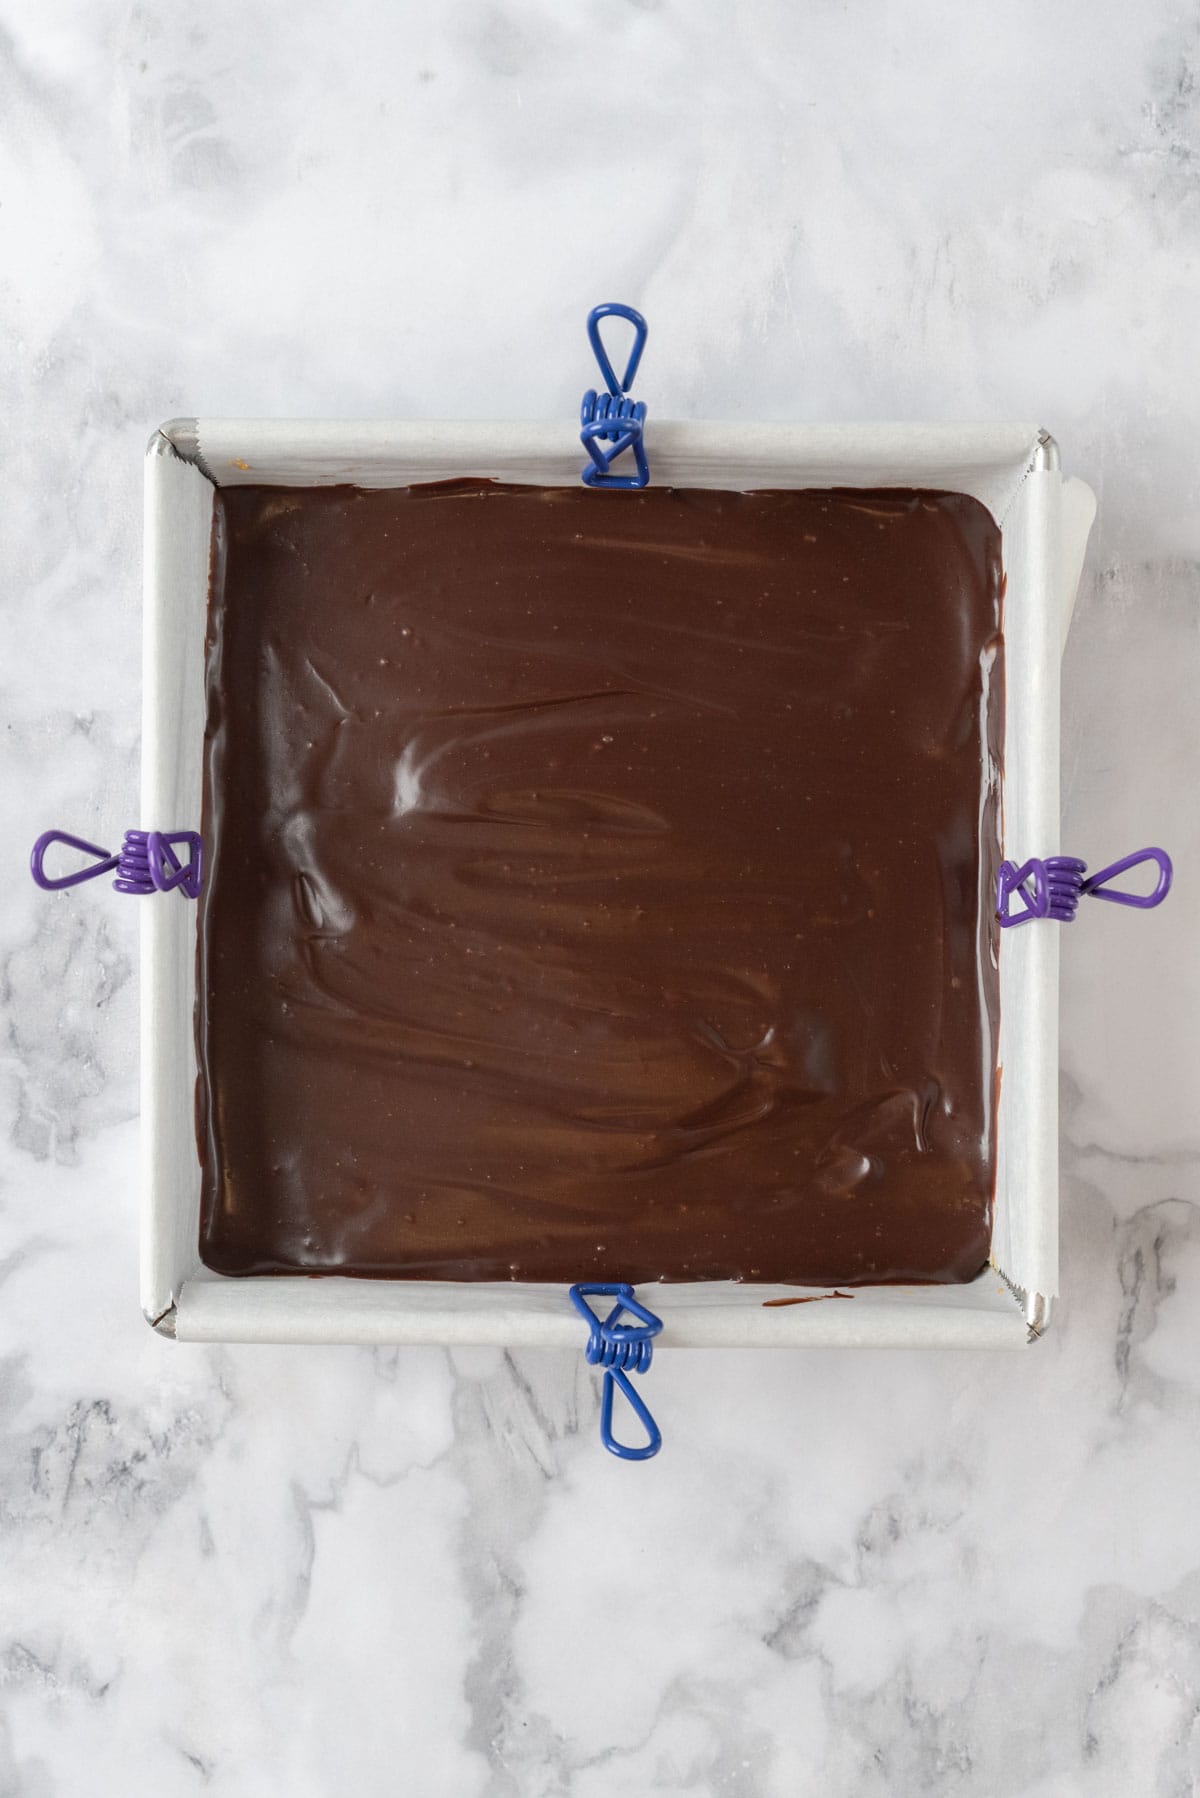
- Step 6: Pour & Chill: Pour the chocolate espresso ganache over the caramel layer and gently spread it to the edges with an offset spatula. If you want a perfectly smooth top, tilt the pan slightly in different directions to let the ganache self-level. Cover the pan with plastic wrap (don't let it touch the chocolate surface) and refrigerate for at least 2-3 hours, or preferably overnight. The bars need this time to set properly.

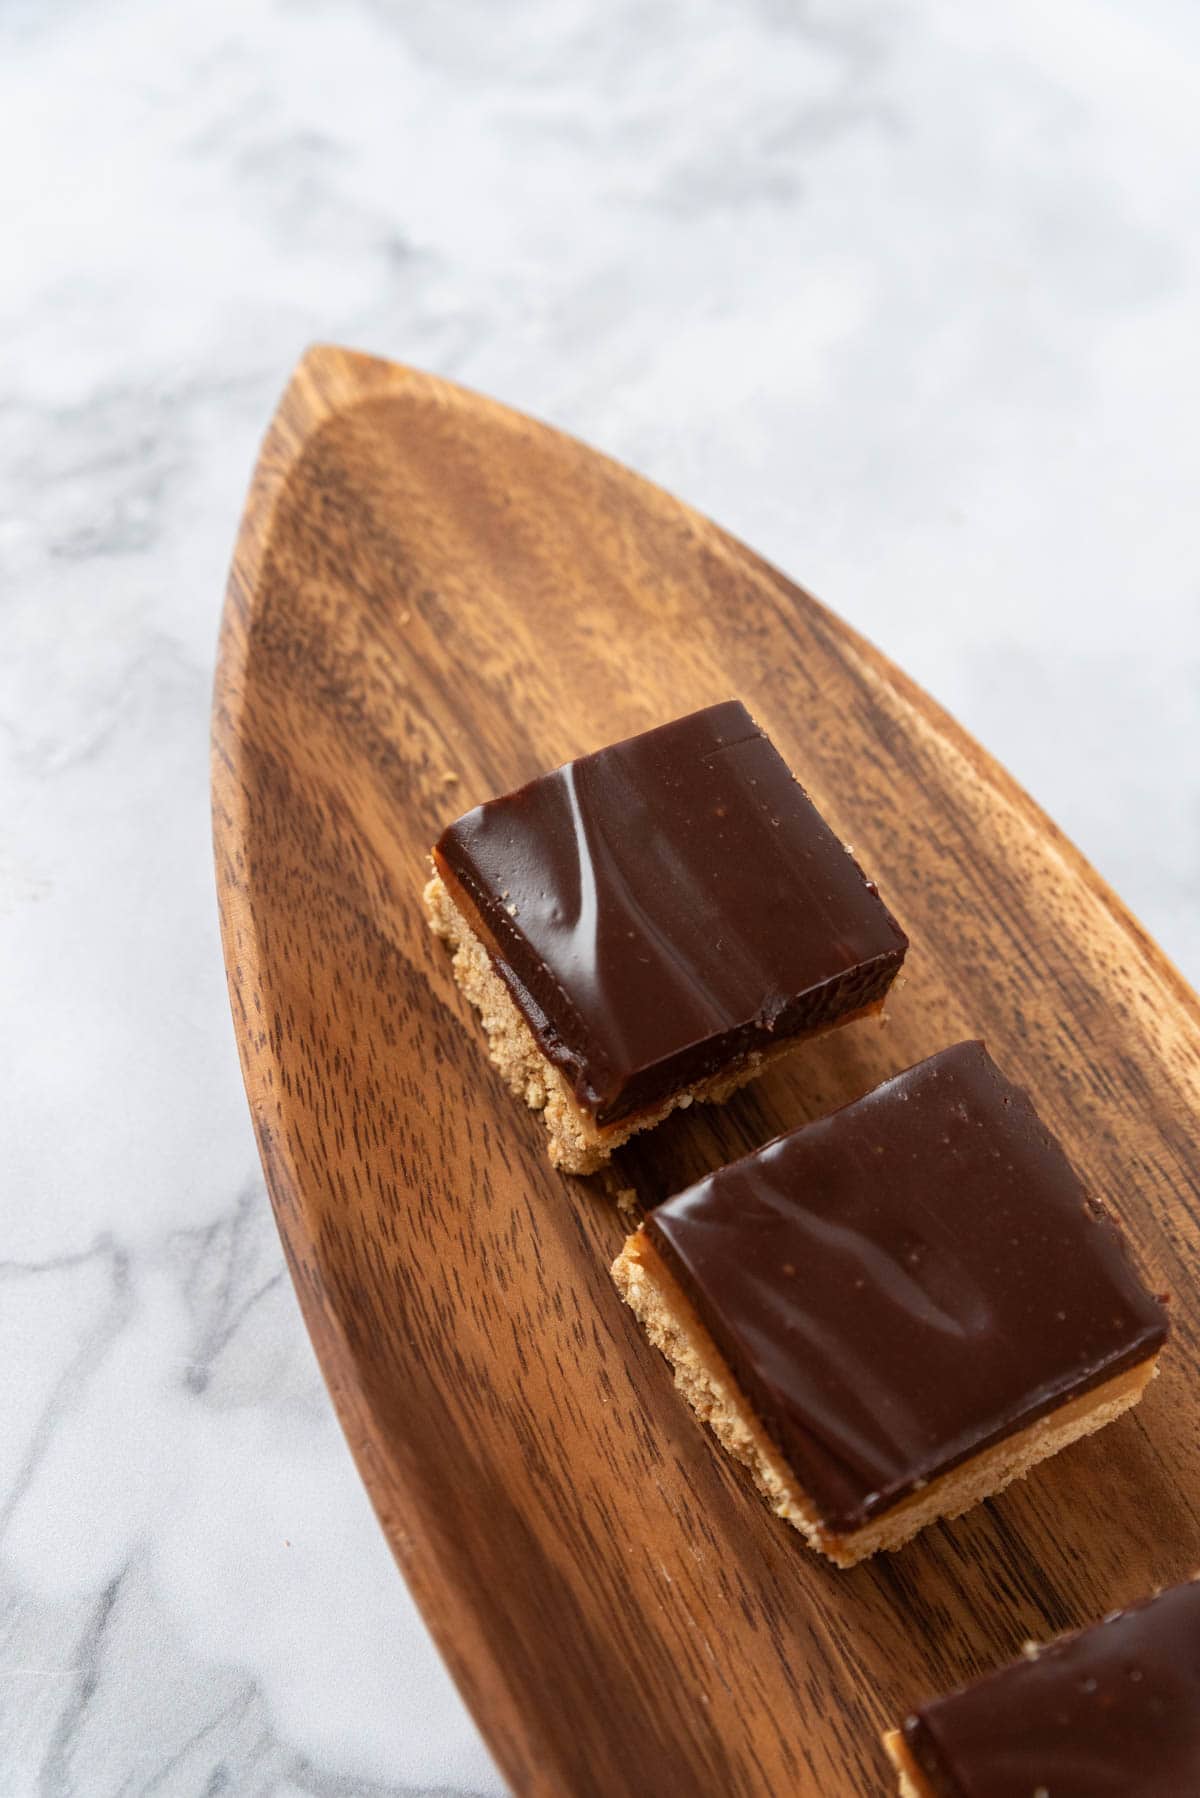
- Step 7: Slice & Serve: When you're ready to serve, use the parchment paper overhang to lift the bars out of the pan and onto a cutting board. Allow them to come to room temperature for 15 to 20 minutes before cutting. For the cleanest cuts, dip a sharp knife in hot water, wipe it dry, and then make your cut. Repeat this process for each slice. Cut these into 16 squares for generous portions, or 25 smaller squares if serving them as part of a dessert table. They're very rich, so a little goes a long way!
Tips for Chocolate Espresso Bar Success
- Don't overheat the caramel or the chocolate; they can separate or become grainy. There will be hot spots, so stir frequently while melting both.
- Chill completely before slicing for neat, bakery-style bars.
- Press That Crust: Use finely crushed crumbs for a crust that holds together and really compacts the crust layer. A firmly pressed crust won't crumble when you cut the bars. Use significant pressure with the bottom of a glass or measuring cup.
- Let Them Come to Room Temperature Before Serving: Be sure to take the bars out of the fridge about 15-20 minutes before serving. They're easier to bite into, and the flavors are more pronounced when they're not ice-cold.
Substitutions & Variations
- No pretzels? More crust option: Use all graham crackers. Vanilla wafers will make a delicious but more delicate crust. To amp up the chocolate factor, use Oreo cookies or chocolate graham crackers. If using Oreo cookies, omit the brown sugar from the crust recipe.
- Add nuts: Chopped pecans or almonds add crunch and a nutty richness.
- Chocolate variations: Use milk chocolate for a sweeter, less intense flavor. Try semi-sweet chocolate (around 50% cacao) as a middle ground. Use white chocolate for a completely different flavor profile.
- Make it spicy: Add a pinch of cayenne or cinnamon for a Mexican mocha vibe.
- Coffee adjustments: Increase espresso powder to 2 tablespoons for serious coffee lovers. Add 1-2 tablespoons of coffee liqueur to the chocolate layer, if desired. Chocolate liquor could be an interesting twist, too, though I haven't tried it.
- Toppings: If you are looking to jazz these up even more, sprinkle on some toppings! Mini chocolate chips, mini butterscotch chips, chopped pretzel bits, flaky sea salt, or crushed candy canes are all good options on Chocolate Espresso Salted Caramel Bars.
Dietary Variations for Chocolate Espresso Caramel Bars
- Vegetarian-Friendly: Ensure your caramel is made without gelatin or non-vegetarian ingredients.
- Gluten-Free: Use gluten-free pretzels and graham crackers. Many brands make excellent gluten-free versions that work perfectly in this recipe. The texture remains just as good.
Equipment Needed
- Food Processor or Zip-Top Bag + Rolling Pin: For crushing the pretzels and graham crackers into fine crumbs. A food processor is faster and gives more uniform results, but the bag method works perfectly well.
- 8x8 or 9x9-inch Square Baking Pan: This is the ideal size for these bars. You want bars that are thick enough to showcase the layers but not so thick they're overwhelming.
- Parchment Paper or Aluminum Foil: Essential for lining the pan. This makes removing and cutting the bars so much easier. Don't skip this step!
- Microwave-safe Bowl: small and medium for the chocolate and caramel, depending on the method of melting you choose.
- Offset Spatula or Butter Knife: For spreading each layer evenly. An offset spatula makes this easier, but a butter knife or the back of a spoon works too.
- Small Saucepan (optional): For heating the heavy cream and melting caramel if you're using caramel candies and don't have a microwave.
- Whisk or Rubber Spatula: For mixing the chocolate ganache and caramel.
- Sharp Knife: A long, sharp knife is essential for clean cuts. A chef's knife works perfectly.
- Measuring Cups and Spoons: For accurate measurements.
Dessert Bar Storage Instructions
- Refrigerator: Store these bars in an airtight container in the refrigerator for up to 1 week. Place parchment paper between layers if you're stacking them to prevent sticking.
- Freezer: These freeze beautifully! Wrap individual bars tightly in parchment paper, then plastic wrap. Place them in a freezer-safe container or bag. Freeze for up to 3 months. Thaw overnight in the refrigerator or at room temperature for about an hour before serving.
- Room Temperature: In cooler months, you can keep these at room temperature in an airtight container for up to 3 days. If the room is too warm, the top layers will become very soft.
Chocolate Espresso Bars FAQs -
You can omit it and make chocolate caramel bars instead! Add a teaspoon of vanilla extract to the chocolate ganache. Or you can use instant coffee or add a tablespoon of very strong, cooled coffee to the chocolate layer (you may need to reduce the amount of cream slightly).
Cracks can happen if the bars are too cold when slicing. Let them rest at room temperature for 15 to 20 minutes before cutting. Be sure to use the hot, dry knife method I talk about in the directions. It helps a lot with clean cuts for any dessert bars with layers.
Absolutely! A thick, chewy homemade caramel works beautifully. Just make sure it cools before layering; it might need a little bit of extra time to cool because it has to reach a much higher temperature to make caramel than to simply melt pre-made caramel.
The crust needs enough butter to hold together. If it's crumbly after baking, you likely needed more butter or didn't press it firmly enough. Make sure the mixture holds together when pressed before baking, and really pack it down in the bottom of the pan.
Love This Chocolate Epresso Bar Recipe? Please tag @poppytrailtable on Instagram and Facebook and leave a star rating⭐ ⭐ ⭐ ⭐ ⭐ and review below! Thank you!
Recent Recipes:
Looking for more recipes to enjoy? Try these:


Recipe
Chocolate Espresso Salted Caramel Bars | Easy Holiday Recipe
Equipment
- Food Processor or Zip-Top Bag + Rolling Pin
- Parchment Paper or Aluminum Foil
- Microwave-safe Bowl
- Offset Spatula or Butter Knife
- Small Saucepan (optional)
- Whisk or Rubber Spatula
- Sharp knife
- Measuring cups and spoons
Ingredients
Pretzel Graham Cracker Crust Layer
- 1 cup graham crackers, crushed
- 1 cup pretzel sticks, crushed
- 2 tablespoons brown sugar
- ¾ cup butter, melted
Caramel Layer
- 11 ounces caramel bits or squares
- 2 tablespoons heavy cream
- 1 teaspoon flaky sea salt *optional
Chocolate Espresso Layer
- 8 ounces dark chocolate chips or bars (chopped)
- 2 teaspoons espresso powder *Use up to 2 tablespoons, depending on preference
- ½ cup heavy cream
Instructions
- Step 1: Preheat Oven & Prepare Pan: Preheat the oven to 350°F (175°C). Line an 8x8-inch or 9x9-inch square baking pan with parchment paper, leaving overhang on two sides to act as handles for easy removal later. You can also use aluminum foil sprayed with cooking spray. This step is crucial and makes removing the bars so much easier.
- Step 2: Make the Crust Layer: In a food processor, pulse pretzels and graham cracker crumbs until finely crushed. Add melted butter and brown sugar, then pulse again until the mixture resembles wet sand. Press firmly into the prepared pan in an even, flat layer. You want a compact, even layer that won't crumble apart later. Bake in preheated oven for 10-12 minutes until the crust is set and just beginning to turn golden at the edges. Remove from the oven and allow it to cool while preparing the caramel.
- Step 3: Make the Caramel Layer: Add 2 tablespoons of heavy cream and soft caramel squares or bits to a microwave-safe glass mixing bowl, microwave for 30 seconds, then stir. Continue to heat and stir in 15-second increments until smooth and slightly thinned, adding an additional tablespoon of heavy cream during the process, if necessary, to achieve a smooth and pourable caramel. *Alternatively, use a double-boiler setup on the stove top. Place soft caramel squares or bits and heavy cream in a heat-safe glass mixing bowl that fits over a saucepan with 1 ½ inches of water. Heat over low, stirring frequently, until completely melted and smooth. This takes about 5 minutes.
- Step 4: Pour & Set Caramel Layer: Pour caramel over the slightly cooled crust and use an offset spatula or rubber spatula to spread it evenly to the edges. Sprinkle with flaky sea salt and allow to cool while preparing the chocolate layer. Be sure it is slightly firm to the touch before moving on to the next step and pouring the chocolate layer. Place in the refrigerator or freezer for a few minutes, if necessary, to firm it up.
- Step 5: Make the Chocolate Espresso Ganache: Chop chocolate into small, uniform pieces if using chocolate bars instead of chips. Place the chocolate in a heatproof bowl. Heat heavy cream in a small saucepan until it just begins to simmer. You'll see small bubbles around the edges. Do not let it boil. Remove from heat and stir in the espresso powder until dissolved. Pour the hot cream mixture over the chocolate and let it sit for 2 minutes without stirring. This allows the chocolate to melt evenly. After 2 minutes, whisk gently from the center outward until the mixture is completely smooth and glossy. Let the ganache cool for 3 to 4 minutes, stirring occasionally. You want it to thicken slightly but still be pourable. If it gets too thick, you can microwave it for 10-15 seconds to loosen it.
- Step 6: Pour & Chill: Pour the chocolate espresso ganache over the caramel layer and gently spread it to the edges with an offset spatula. If you want a perfectly smooth top, tilt the pan slightly in different directions to let the ganache self-level. Cover the pan with plastic wrap (don't let it touch the chocolate surface) and refrigerate for at least 2-3 hours, or preferably overnight. The bars need this time to set properly.
- Step 7: Slice & Serve: When you're ready to serve, use the parchment paper overhang to lift the bars out of the pan and onto a cutting board. Allow them to come to room temperature for 15 to 20 minutes before cutting. For the cleanest cuts, dip a sharp knife in hot water, wipe it dry, and then make your cut. Repeat this process for each slice. Cut these into 16 squares for generous portions, or 25 smaller squares if serving them as part of a dessert table. They're very rich, so a little goes a long way!
Notes
Dessert Bar Storage Instructions
- Refrigerator: Store these bars in an airtight container in the refrigerator for up to 1 week. Place parchment paper between layers if you're stacking them to prevent sticking.
- Freezer: These freeze beautifully! Wrap individual bars tightly in parchment paper, then plastic wrap. Place them in a freezer-safe container or bag. Freeze for up to 3 months. Thaw overnight in the refrigerator or at room temperature for about an hour before serving.
- Room Temperature: In cooler months, you can keep these at room temperature in an airtight container for up to 3 days. If the room is too warm, the top layers will become very soft.
Top Tips
- Don't overheat the caramel or the chocolate; they can separate or become grainy. There will be hot spots, so stir frequently while melting both.
- Chill completely before slicing for neat, bakery-style bars.
- Press That Crust: Use finely crushed crumbs for a crust that holds together and really compacts the crust layer. A firmly pressed crust won't crumble when you cut the bars. Use significant pressure with the bottom of a glass or measuring cup.
- Let Them Come to Room Temperature Before Serving: Be sure to take the bars out of the fridge about 15-20 minutes before serving. They're easier to bite into, and the flavors are more pronounced when they're not ice-cold.

Comments
No Comments